Photo: Shutterstock/lightpoet

Travel Photography Tip: When to Use Shutter Priority and Why

Travel
by Kate Siobhan Mulligan Nov 21, 2012
For pros and beginners alike, Shutter Priority can be a very good place to be on your camera. Stay tuned for more travel photography tips, or, in the meantime, visit MatadorU.

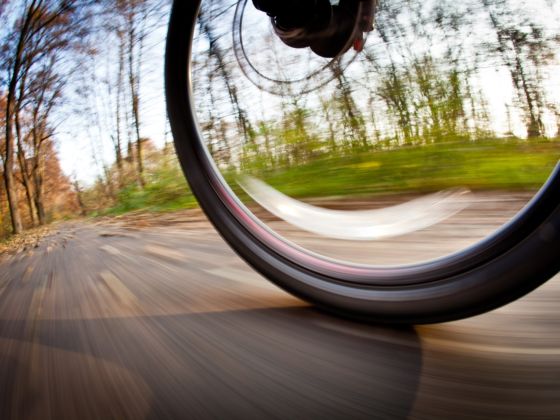
A COMMON PIT STOP on the road to shooting in Manual is Tv (Canon) or S (Nikon), a semi-manual mode that allows you to control the shutter speed; it then selects the appropriate aperture (and ISO if you want it to) to get a correctly exposed image.

What is shutter speed? It refers to the amount of time you allow for the shutter to open and close, usually expressed as a fraction of a second. For example, 1/100th means you’re giving it 0.01 seconds to open and close. It’s determining just how much light you’re letting hit the sensor, which determines the exposure of the image. Too much light, and your shot will be white or washed out; too little and it will be dark.

Shutter Priority allows you to set the ISO as well as shutter speed. ISO is your sensor’s sensitivity to light. The higher the ISO, the more sensitive to light your sensor will be, therefore allowing you to increase the speed of your shutter. But ISO also adds more noise (grainy bits you can see, especially in shadows) when boosted high. You can leave it on Auto, and let the camera decide, or you can set it yourself. I recommend setting it yourself and leaving it at 100 until you absolutely need the boost to get a faster shutter speed.

While it has many uses, there are three very common motives for using Shutter Priority:

1. To freeze action

If you want a shot that captures the details of a split-second, Shutter Priority is your friend. A fast shutter speed is generally considered 1/500th or faster — with newer DSLRs capable of 1/8,000th. Your goal with speeds this fast is to freeze the action taking place.

Shooting sports, for example, requires high shutter speed because you probably want to freeze all the action. You will have a very hard time getting a sharp image of that surfer without a high speed to freeze him in motion. If you don’t often shoot sports, the same idea can be applied to festivals, events, animals (think: birds in flight) or children who won’t sit still. It’s also great for freezing sprays of water; same goes for something that’s spilling, exploding, breaking, etc. If you know your best friend is about to throw her drink in someone’s face, it’s time to get to Tv and bust out some fast speeds.

Tip: The faster your speed, the less light you’re letting in. If your pictures are coming out dark, you need to either lower the shutter speed or increase the ISO. If lowering the shutter speed means not freezing the action at hand, then it’s time to boost your ISO to compensate — but be aware of the noise this brings into your image.

2. To imply motion

On the other hand, sometimes you want to imply or reveal motion by using a lower shutter speed. This leaves the shutter open longer, allowing the sensor to capture any movement that takes place.

A slower speed is technically less than 1/500th, but motion really starts to get revealed around 1/50th, and increases as you come closer to working in full seconds. And yes, you can go over a second — most DSLRs will let you get as high as 30 seconds, which would be expressed as 30”.

There are lots of situations where a slow shutter speed can be loads of fun. In a city setting, it can capture the madness of traffic and overpopulation. It can also be quite beautiful: A long exposure of a flowing waterfall, for example, will give the water a soft, smooth look. If it had been taken with a fast shutter speed, the water would be frozen with lots of detail — not necessarily lending to the mood the motion brings.

Because the longer speed lets in more light, it’s best done in lower-light situations, and with a low ISO. This is especially true if you want to play with full seconds. If there’s too much light hitting the sensor, the picture will be washed out or even totally white.

Tip: As your shutter speed gets longer, there’s more of a risk for something called “camera shake.” Humans are actually not very stable, and our hands shake a bit when we hold our cameras up. With fast speeds, this isn’t a problem. With slow speeds, however, it becomes very noticeable and can cause blur. Always use a tripod or set your camera on something stable.

3. To battle camera shake

As mentioned above, camera shake becomes visible at shutter speeds longer than 1/50th, and sometimes even up to 1/100th or higher depending on severity. If you’re shooting hand-held — or you’re a traveler who often ends up on chicken buses, fishing boats, old trains, or other less-than-smooth modes of transport — you can use Shutter Priority to make sure you don’t dip below 1/50th and end up with blurry shots.

Tip: If you’re fighting to find enough light (images are dark) or sharpness (still blurry), you can boost your ISO, increasing the light sensitivity, until you obtain fast enough shutter speed for a clear shot. * In the MatadorU Travel Photography course, you’ll learn the skills you need to become a travel photographer.

Discover Matador