Photo: Kuznetsov Dmitriy/Shutterstock

10 Tips for Starting an Edible Container Garden

by Anna Barto May 2, 2011
Like many people, I’ve always had good intentions about eating locally and sustainably.

BUT THE SUBWAY DOESN’T STOP at Trader Joe’s, and the waiting lists for CSAs (Community Supported Agriculture) and community garden plots can be years long–not to mention an intimidating commitment for a beginning gardener!

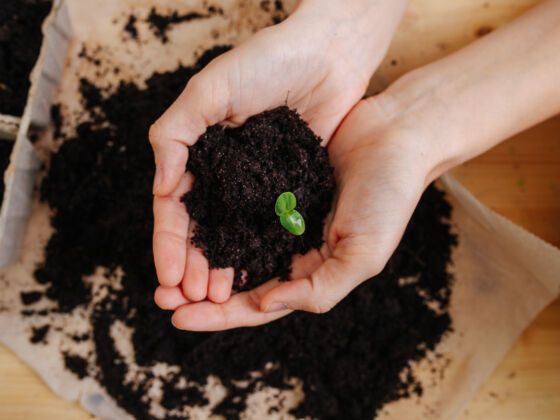
That’s why I got into container gardening.

Container gardening–growing plants in pots instead of the the ground–saves space, money and the environment. Even if you don’t live in an urban area, planting in containers gives you increased control over soil and growing conditions.

Best of all, you can start small.

Three years ago, I began with single pepper plant on my Boston rooftop, and before I knew it I had a dozen planters brimming over with lettuce, onions, spinach, and herbs.

Here are my tips for getting started:

1. Maximize small spaces.

You can can grow food pretty much anywhere: on balconies, fire escapes, window sills, roofs, stoops, under skylights, or in hanging baskets, to name a few.

I recently had wooden planters bolted to a retaining wall outside my apartment building. Whatever you do, check with your landlord first if you’re a renter; you don’t want to be held responsible if a pot comes crashing through the roof!

2. Move toward the light.

Most vegetables require full sun, so choose a spot with southern exposure if possible. Place containers near walls and balustrades to shelter plants from strong wind and rain.

Use taller plants, such as tomatoes or peppers, to shield smaller ones. Clustering containers also helps reduce evaporation.

The beauty of container gardening is that you can rearrange your plants just as easily as you rearrange the furniture.

3. Use your imagination… and your screw driver.

Not only can you grow food pretty much anywhere, you can grow it in pretty much anything. You can find planters of any shape, size and style at your local garden center.

But if you’re on a budget –and who isn’t these days?– almost anything can be recycled into a planter: bathtubs, tires, coffee cans, wine barrels, buckets, kiddie pools, dresser drawers, even shoes. Check out this Matador photo essay for some inspiration.

To work as a planter, the only requirement is that your container hold soil and permit drainage. For the latter, you can drill holes. Most of my containers are window boxes I salvaged from ongoing home renovations in my gentrifying neighborhood.

If you really want to get crafty, you can make your own containers.

4. Get good dirt.

You can buy ready-made potting soil from the local garden center or create your own “recipe” from ingredients like peat moss and compost, which can be adjusted according to the different plants’ nutritional needs.

There are even ways to score free container soil. Just be careful not to confuse “potting soil” with “topsoil” or “garden soil,” which is too dense for your purposes.

5. Ensure the right fit.

Use wide, shallow containers for crops like lettuce, onions, and greens, and save deeper ones for tomatoes, peppers, carrots, and other root vegetables.

I like this chart from the Arizona Master Gardener Manual, which shows the minimum container size required for most common vegetables.

To save potting soil, and to keep pots from getting too heavy, you can also line the bottoms with a light-weight filler, such as empty bottles (caps on), styrofoam peanuts, or crushed cans.

6. Determine your hardiness zone.

Hardiness zones are determined by the average maximum and minimum temperatures in a geographic region. Knowing what hardiness zone you live in will influence not only what you plant, but when you plant it.

Gardeners in the US can look up their hardiness zone by ZIP code, and About.com has links to hardiness zones for countries around the world.

7. Choose container-friendly crops.

Just as some people are particularly well-suited to apartment life, certain plants do better in close quarters than others.

Crops like radishes, leafy greens, and scallions, which grow fast and take up little space, are ideal for container gardens, while larger species, like corn, for example–even assuming you can keep it alive–may not produce enough to make it worth your while.

The increasing popularity of container gardening also means that every season new fast-growing and dwarf varieties are developed with container gardening in mind.

A more complete list of container friendly crops can be found here.

8. Pay attention to timing.

Most container vegetables can be started from seed, on a sunny windowsill or under a grow-light, before it even stops snowing. You can buy inexpensive seed starter kits like these, or make your own out of egg cartons or empty yogurt containers.

Once the weather improves, transplant seedlings outdoors. (A few crops, such as root vegetables, are better off being sown directly into their permanent containers).

Here is where timing gets tricky. Some seeds take longer to germinate, meaning they need to be started earlier; some seedlings can withstand light frost. Others can’t be laid out until the nighttime temperatures are consistently above 50 degrees.

There are lots of dates to keep track of, and it’s not an exact science, especially in an unpredictable climate like New England. Right now I have a three mutant zucchini seedlings sprawling out of their yogurt container starter pots and all over my kitchen window sill, just raring to get outside, but it won’t be warm enough for a couple more weeks.

Fortunately, there are a lot resources available to help you keep track of everything, like this printable seed starting chart.

9.Don’t kill your plants (not all of them anyway).

Something I hear a lot from friends is they would like to have a garden but they are sure they would find a way to kill their plants, albeit by accident.

While I can’t claim innocence– I take responsibility for the scorching death of many a leaf lettuce, as well as the water boarding of an innocent rosemary– I have been able to keep the majority of my plants alive long enough to enjoy the harvest.

One reason is that I pay attention to the weather. If we’re in for a heat wave, I’ll use an old sheet as a shade cloth to protect cool weather crops like lettuce and spinach from the sun’s rays. For cold and frost, cover plants with burlap or make inexpensive cloches out of recycled materials. And if all else fails, you can always bring the container back inside.

10. Don’t let anyone– or anything- else kill your plants either.

Living in an urban area doesn’t mean your garden is any less at the mercy of the wild. If anything, the shortage of green space actually makes for more competition. In addition to your run of the mill aphids and lettuce loopers (for natural remedies against them see this advice), you have to contend with birds, raccoons, rats, and cats, all of which see your containers as the perfect toilette.

Lately I’ve been on the warpath against the crafty squirrels who dig holes even in my most hard to reach containers. Sprinkling cayenne pepper over the soil seems to discourage them, at least for a day or two. It also helps to surround your garden with chicken wire or cover plants with plastic netting.

When you travel, find someone to take care of the garden, and leave specific instructions. While I was in France for ten days my well-intentioned roommate somehow managed to water half my plants to death during a July heatwave.

For the many questions left unanswered here, I recommend The Bountiful Container, by Rose Marie Nichols McGee and Maggie Stuckey.

There are also some great sites and blogs dedicated to container gardening. Here are some of my favorites:

Life on the Balcony

Permaculture for Renters

Container Gardening
Balcony Container Gardening
Container Gardening for Food

I invite you to add your own recommendations in the comments section below.

Community Connection:

For other DIY projects, check out 10 Ways to Reuse Wine Bottles.

Discover Matador