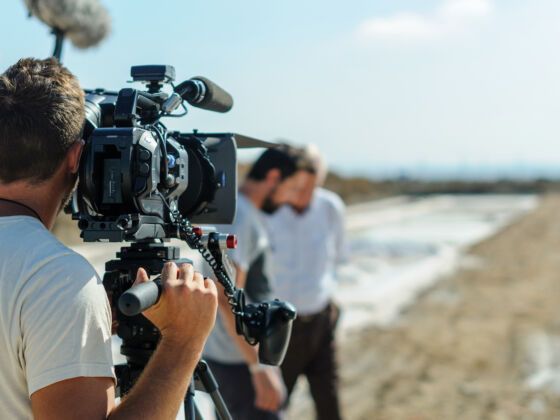
Arriving, I had delusions of following people around on their daily rounds. An invisible camera catching life as it’s lived away from the lens. Just me. And someone doing closeup sound with the external mic. And another on a second camera. Estelle translating our questions and Francis’ answers.
What was I thinking?
Documentary videography — particularly the more complicated you try and get technically — is disruptive. Perhaps if you were willing to hang about with minimal gear for a fortnight, a month, or longer, you might fade into the background noise of people’s days. For anything shorter, and anything with a team, you will leave a footprint in all social spaces you film in. Learning to deal with the awkwardness is something to pick up early on. Do you need a shot of someone being greeted and let in the front door? A closeup of the baker’s rolling pin, or a climber adjusting their gear? Be willing to ask for shots like that. People are generally happy to show off their skills, or repeat a move, and you’ll have far better options for later editing by getting over shyness and explaining to subjects what you have in mind.
Which, it bears pointing out, is different to asking people to give you things they wouldn’t ordinarily, or act in ways that are unnatural. Because then it ceases to be a documentary, and morphs into some kind of quasi-fictional piece.
2. Think about sound.
Tom is putting the Rode mic in his mouth and chewing on the foam covering. Aaagh. The noise!
Sound is important. It’s an unfortunate oversight that the activity is called videography. Sound-and-videography would be far more useful, though an inelegant job title at cocktail parties.
Also important is the realisation that, for the most part, onboard sound on any device is terrible. You might not realise how bad your camera’s onboard audio is until you try out something like a Rode shotgun mic, a decent lavalier, or even a sound recorder. But then you’ll know, and it’ll be impossible to go back. Like the time you finally grasped the appeal of real beer, or older whiskeys.
So get a decent microphone, and then keep it safe from the wind. There’s a device for that, called a deadcat, and it looks like, well…a dead cat. Those grey fluffy things that professional folk stick on their mics.
Headphones are superb for telling you important technical information about your sound. Like whether you have it on. (That happened on day one.) They can also give you an idea of whether you’re getting wind noise, and whether the volume is too low / too high / distorting / full of noise from the goats behind the subject.
Mediocre video quality can often pass if the sound is good. Horrible audio — no matter how good the visuals — is always horrible.
3. Arrange access, do your research, and be prepared to spend time to get everything you need.
Why yes. We will be staying the week, actually.
The purpose of a documentary is generally to teach others about something interesting. Not to teach you. You should know the fundamentals of the subject before you arrive, and use your time to shoot the video that can make those fundamentals clear. The more you know beforehand about the subject you’re shooting, the more likely it is you’ll be able to ask the kinds of questions and arrange the kinds of access that will produce the most interesting footage.
Before we visited Orania, we knew there would be exactly one busy weekend in the next month or two, and we went for that. And for that preparation, we got to include footage of a memorial lecture in honour of the architect of apartheid, and a high school dance. The town was also busier than it would otherwise have been, with more interesting characters washing around. If we’d just picked a date for our own convenience, we would have missed it all.
4. Choose your team well. You will come to love or hate them. Late nights are a must. But so is having fun.
I can’t breathe. It’s 3am and we’ve stopped recording narrations because we’re laughing too hard.
Shooting in a strange location for a limited time is hard work. You must get the material you need before you leave. You also need to work on fitting it all together into a rough story while you still have time to change direction, decide you need new shots, or give up on particular angles completely. That involves long days of creative thinking, and intense technical focus. It’s exhausting.
As with any group activity with very little sleep and lots of work, it helps to choose a team that can weather the storm. When it’s 3am and things are tough, you need to be able to laugh and work it out, not spend energy on bitching and fighting. Team play is as important as technical expertise. A late-night prima-donna tempts homicide and a shallow grave by the roadside on the way to filming tomorrow.
5. Pay attention to detail. Clothing and time of day, for example.
Brad’s shirt is beginning to stink. At the moment, it’s somewhere on the dial between fishpaste and ammonia. And we’re probably going to need to ask him to wear it again tomorrow. In the sun. For much of the afternoon.
Wardrobe, it turns out, is important. Not just for making sure your lead is rocking some appropriately schweet threads for their on-camera appearances, but for ensuring they don’t have to rock the same schweet threads every day. Which, when you’re shooting for four or five days, can pose specific challenges to hygiene and inter-group dynamics.
The problem, of course, is that your onscreen characters need to appear the same throughout — even when in reality the shots might be spread over a number of different days. There are some exceptions to this (like characters changing to go swimming, or clearly ending a day and transitioning to a new one, for example). Otherwise, consistency is important. Probably the simplest approach would be to dress your actors down to wearing something like jeans and a simple shirt. Something you can have more than one set of, in order to swap between them from day to day.
Less obviously, this consistency also applies to light. Are you shooting a mix of shots in what is clearly morning, afternoon and evening light? If so, then pay attention to how you arrange them, so as not to have odd or impossible transitions.
6. Remember filler shots.
Getting in the car? Check. Getting out of the car?
You’d be surprised at the number of different shots it takes to make up a documentary. Every action your characters take needs to be suggested somehow. Small things like turning to leave a place, or climbing in a car so a subsequent scene of driving seems a little less unexpected — all of these require separate clips. During an interview, if someone’s describing the town, a particular cafe, or a statue of the founder of apartheid, you need video of these things if you’re going to rescue your viewer from the boredom of watching a talking head forever.
Even if you don’t use everything, you need options. Think you have a beautiful shot of the lead getting into the car? Try it again from a different angle, or closer. You might find an unexpected shot will fit much better later on, or that you can’t use the brilliant low-angle shot of climbing into the car because the actor changed their shoes somewhere between Monday’s video and today’s. Thank god you have another.
7. Storyboard! And be flexible.
OK, so we have 135gb of footage from today, and an empty timeline. I think we should have planned a bit better.
Storyboarding is the art of deciding beforehand the order of events, and the kinds of shots that will communicate the story’s progression. In our case, we needed to start with an introduction to what the doccie was going to be about — so maybe the camera could pan up to the lead talking in front of a town sign [Boom — Scene 1!], then walking to the car [2!], starting the engine or pulling off somehow [3!], and talking to the camera as he drives there [4!].
Storyboarding means being sure you have all the footage you need to tell the story you want to. That you have all the filler shots (see above) you need to draw the audience along with your story and have it make sense. In a way, it’s pretty straightforward — if you know what story you want to tell, sit down and brainstorm the kinds of scenes you’ll need to tell it.
The problem with documentaries, of course, is that the story isn’t always obvious. Establishing is easy enough, if you did your research beforehand, but what then? What if the first interview gives you something wholly unexpected, and it’s no longer honest to tell the story the way you initially imagined?
That’s why storyboarding should be a flexible thing. Have a plan and stick to it if the story bears it out. But if it doesn’t, be prepared to change. There’s nothing wrong with reformulating your storyboard, but do it while you still have the option of getting the new material that changed circumstances require. Otherwise, you’ll get home and realise your new storyline needs a clear shot of a subject’s rock collection, and that you don’t have one.
8. Make the most of mornings and evenings. Use afternoons for indoor interviews.
The light is dead, flat, and dusty. It’s time for an indoor interview, or a beer.
As with photography, the golden period that makes up the first and last hours of a day is best for shooting truly gorgeous material. Afternoon hours typically have terrible outdoor light, so if you have indoor interviews, plan to do those later in the morning and afternoon, leaving you free to make the most of nicer light for filler and other shots. Or — if you like — take your indoor interview outside to take advantage of good light far away from lunchtime.
There are outliers, of course. Maybe you need scenes in afternoon light to maintain consistency. Or maybe you’re carrying enough lighting gear not to care. Or maybe you want a washed-out shot. If not, shoot in the golden hours.
9. Bring a tripod.
You are not a scout sniper. You are not made of stone
.
Unless you’re shooting Blair Witch, or have a good reason for wanting a ‘handheld look’, bring a tripod. Rock-steady shooting goes unnoticed, and that’s a good thing. If you don’t have a tripod, see if you can rest the camera on something.
For extended filming, setting the camera on a chair, a car bonnet, or a box will do wonders in a pinch for the stability of the resulting footage, but there really is no excuse for not bringing a tripod along.
10. Try out DSLRs and multiple angles if possible.
Katherine is working the main camera, while Tom sits behind the interviewer’s ear with his 5D. I’m somewhere down in the sand, doing a closeup of the speaker. Oh god, this is going to be beautiful.
Digital SLR cameras make beautiful video, even more so when paired with decent lenses. They’re also really, really cheap when compared to a camcorder of similar abilities. So if you have them, bring them along to give you second and third angles on interviews, and for capturing beautifully sharp filler shots in the glorious evening light.
The benefit of having a second camera angle in an interview goes beyond aesthetics, though. Unless you’re intending to use your interview largely uncut, you’ll need to jump between sections. Being able to make that jump by going from one camera angle (as the subject finishes a sentence) to another (as they begin a new sentence elsewhere in the footage) can professionalize your footage.
11. Put time aside for edits.
Just one more…
Editing will take longer than you think. Always. And the more you edit, the smoother the piece becomes. Set time aside while you’re onsite to get a rough edit in place. Throw the stuff you think you’ll use on a timeline to check if it’ll work, and whether the scenes you shot that day from your overall storyboard work together. Rough edits help you avoid leaving important material out, and can give you a sense of where you need more material.
When you get home, be prepared to spend a great deal of time, coffee, and the life of your eyeballs on the task of properly editing the final product. When you think you have everything together, render and give it a run through. As you find things you hate, make a note of them and carry on watching. Polish all over again. Make sure your sound and colour grading is consistent. That your scene flow makes sense. That there’s nothing in the piece that might only make sense to you because you were there. Wash, rinse, repeat. Over and over until you’re happy everything is as close to 100% as you can make it.
Then pour a stiff drink and get someone outside your production clique to take a look at it and comment. It’s a painful, but necessary, test to make sure your piece will resonate with someone who wasn’t there, and may not know the background. Listen to their feedback, make more notes, and get back to the editing.
The more you edit, and the smaller the issues become, the tougher it is to find the willpower for one more go, rather than just kicking the video out into publication. At that point, it’s good to remember the massive work you’ve put in so far. It makes the last few tweaks worth the time and effort.
12. Don’t beat yourself up if you haven’t managed to make the most transformative video in history.
In the end, anything creative (and particularly video) is a learning process. The piece you end up with will inevitably be better than what you were capable of on day one, but worse than if you’d started with everything you know now. That’s just the nature of the process, and a sign that you’ve learned from it.
So put a ribbon on it, send it out into the world, and get ready for your next project. There are at least a dozen more lessons waiting in it.