How to Begin Customizing Your WordPress Travel Blog With No Worries

Travel
by David Miller May 31, 2010
By using a child theme you can begin playing with your blog’s typography, colors, and layout without worrying about messing anything up.

So I’m assuming most of you have WordPress blogs or are thinking about switching over to WP.

For a long time I’ve hesitated really playing with my blog because when I look at code in backend–html and php–I always think the same thing–“I’m gonna kill my blog if I mess with this.”
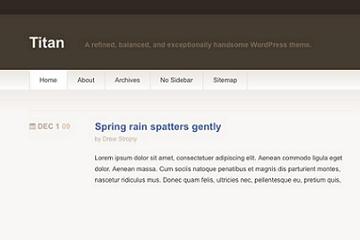
The thing is, I’ve really wanted to change the typography and look of my blog and make it my own, not just a standard theme. This weekend I found the answer: you make a “child theme.”

What is a child theme?

A child theme is basically a super-miniature theme (it just has a single component, the style.css sheet you create–instructions below) that borrows all the code from a “parent.” This allows you to mess around with whatever elements you want–fonts, colors, spacing, images–just by copying and pasting little snippets of code to your child theme and experimenting with them.

No matter what changes you make to your child theme, you can always erase them and start over, or just save your changes, then switch back to the parent theme so it’s the one that’s “live” after you’re done working. You can then go back and play around on your child theme again later as a work in progress.

I learned all of this from a very good pictorial introduction to making child themes that takes you through how to set one up step by step.

[Note: there’s one stipulation for all of this–you have to have FTP access to your WordPress blog to do this. You can’t create these if it’s just a WordPress.com blog.]

Here’s an outline:

1. Find the directory listing name (caps sensitive) of your theme. For example, my theme is “Thematic” however the directory listing (the listing that’s on my server uploaded via FTP is “thematic”).

2. Copy and paste the following into a text editor (with the blanks filled out according to your info):

/*
Theme Name: name your child theme whatever you want, for example, ‘your remix”
Theme URI: put the url of your blog here
Description: put a description recognizing this as a child theme, ex: ‘child theme for thematic’
Author: your name
Author URI: put your blog url here
Template: the directory listing of your parent theme, for example ‘thematic’
Version: put whatever you want here. ‘1.0’ is a logical first version
*/

@import url(“../thematic/style.css”);

In this example I’m using thematic as the parent theme. For your own blog you have to put in whatever the directory listing is, for example, let’s say your theme is “kubrick,” then the bottom line would read:

@import url(“../kubrick/style.css”);

This bottom line is basically the only code in your entire theme. It’s simply telling WordPress to import all of the styles from whatever the parent theme or “template” you’ve listed.

3. Once you’ve completed this doc, save it as exactly this: style.css (it has to have a css or Cascading Style Sheet extension).

4. Create a new directory in the themes folder with the name you’re giving your theme, for example “your remix.”

5. Upload the style.css into this folder via FTP.

6. Go to the backend of your blog, then Appearance>>Themes, and, if you’ve done everything correctly, you should see your new child theme (there won’t be a screen shot, but you’ll see the name / info you put in) listed under available themes. Click activate.

7. Because your child theme is simply importing everything from your parent theme, it will look identical. Now you can have fun. Open the Appearance>>Editor, then choose style.css (you should see exactly the same doc you created.) Now go back to the stylesheet of your parent theme (you can download it onto your desktop or just view via FTP) and look for things you want to change. Copy those, then paste them into your child theme stylesheet open here in the editor.

8. If you’re like me and stylesheets just seem like impossible to follow jibberish, you can download a sweet tool for Firefox called Firebug that enables you to click on the elements of a page and then it gives you the corresponding CSS code. This allows you to look at your parent theme in a different window, click on parts you want to change, then copy the CSS code it gives you and paste it into the editor.

All of this stuff is very time-consuming at first, but it feels good to begin modifying your blog and not worrying that you’ll ruin anything.

Please comment below if you have questions or advice.

Discover Matador

Save Bookmark

We use cookies for analytics tracking and advertising from our partners.

For more information read our privacy policy.