Photo: seewhatmitchsee/Shutterstock

Travel Photography Tip: Understanding Exposure

Travel
by Kate Siobhan Mulligan Jan 2, 2013
In this tutorial, Kate Siobhan Havercroft “exposes” another mystery of SLR photography. Learn more about our travel photography course at MatadorU.
What is exposure?

THE TERM EXPOSURE, in regards to photography, comes from Ye Olde Days of film cameras. It literally means to expose the film to light. In today’s sense, it means to expose your sensor to light.

A “correct exposure” then is an image where the sensor was exposed to just enough light to balance the highlights (whites) and shadows (blacks) properly. Too little light results in an “under-exposed” image, which is too dark; too much light and it’ll be “over-exposed” or washed out, and too bright.

What occurs is this: There’s a mirror blocking your sensor until you actually hit the shutter, and when you do, the mirror flips up and allows light to hit the sensor and “expose” your image. How much light, and for how long, depends on your settings.
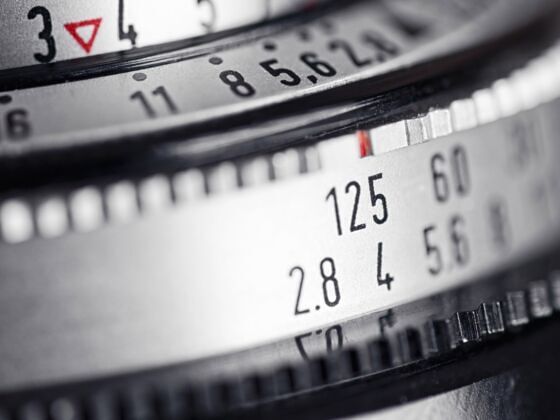
Exposure settings

Shooting in any automatic or semi-automatic mode will technically expose the photo correctly for you whenever possible (in other words, most of the time). Here’s how exposure works in each setting:

  • Auto: The camera selects all the settings, including ISO, and often these settings are…dumb. Your exposure will be correct, but more often than not the camera is just averaging out the settings like a math equation — it’s as anti-creative as it sounds. This usually yields results similar to a point-and-shoot. Also, if the scene is too dark, the flash will fire automatically to compensate.
  • P or Program: You can select the ISO, and the camera chooses the rest of the settings. Hardly any better than Auto. As well, you decide if the flash fires or not (please don’t, unless you’re shooting an American Apparel ad).
  • Tv/S (Shutter Priority): You choose the shutter speed and ISO, and the camera chooses the right aperture for a correct exposure. Read more on Shutter Priority.
  • Av/A (Aperture Priority): You select the aperture and ISO, and the camera chooses the correct shutter speed. Many photographers shoot in this mode when scenes are changing too fast to be in full manual. Read more on Aperture Priority.
  • M or Manual: The holy grail for beginners. You select your aperture, shutter speed, and ISO, and use the meter reading in the camera to adjust the exposure accordingly. More about metering below.

The settings that control exposure are:

  • Shutter Speed: The length of time the mirror is up, exposing the sensor. This can range from 30 seconds to 1/8000th of a second. Thirty seconds is so long, allowing in so much light, that it would need to happen after dusk, while 1/8000th is so incredibly fast that it would need to be very bright out in order to let enough light in in such a short time.
  • Aperture: The opening inside the lens which controls the amount of light. Wide open, it allows all possible light to pass through; but it can be narrowed to even a pinhole, cutting out extra light. If shutter speed is the time the mirror is up, then aperture is the amount of light that is allowed through.
  • ISO: ISO is how sensitive the sensor is to light, ranging from 100 to 6400 on most modern DSLRs. A low number like 100 or 200 means the sensor will be least sensitive; a high number like 1000, 2000, or more is far more sensitive. However, the tradeoff is something called “noise” — grain in your image, especially in shadows, which affects the overall quality of an image.
The suntanning metaphor

To help you grasp the connection between ISO, Shutter Speed, and Aperture, here’s a comparison to another way we often expose ourselves to the sun — tanning.

We start with ISO. This would be your skin tone. Some of us burn faster or slower than others. So a darker, more olive skin tone, or a great base tan, would be a low ISO. It’s less sensitive to the sun’s rays. The other end of the spectrum would be fair skin, which sometimes burns almost instantly. That’s high sensitivity to sun, just like high ISO.

Next we apply sunscreen, which is our aperture. If you apply SPF 100, you’ve blocked out most of the sun’s burning rays, allowing very few in. That is a high, or narrow, aperture — it’s blocking most of the light. However, maybe you apply SPF 30, allowing more of the light through. Or maybe you aren’t wearing any sunscreen, allowing all the light through. That would be a low, or wide, aperture, which allows most of the light through to the sensor.

Lastly, how long do we spend in the sun? That’s shutter speed. It depends on your “sunscreen” and your sensitivity. Maybe you have darker, less sensitive skin (low ISO), but no sunscreen (wide aperture); you wouldn’t want to be in the sun for a whole lot of time (fast shutter speed). Beginning to make sense?

The exposure meter

The light meter is a sensor in your camera that tries to “read” the available light for the scene you’re shooting. If you’re shooting in automatic modes, it selects the settings for you as per above. If you’re in semi-automatic, as you learned, the camera will select the other setting to get a correct exposure. If you’re in manual, though, you need to actually read your light meter to see if the exposure is correct.

With both Canon and Nikon, you’re aiming for the “zero” in the middle. On Canon, if it’s over to the right, it’s over-exposed. You need to up your shutter speed, lower your ISO, or narrow your aperture (at least one has to change). If it’s to the left, it’s under-exposed. You need to lower you shutter speed, raise your ISO, or widen your aperture. (On Nikon, it’s opposite: over-exposed is to the left, and under-exposed is to the right.)

Learning and progressing

As you learn to use your light meter and adjust settings accordingly, you begin to take full control over your images. The next stage is learning about which settings to change, when, and why, since you now have choices with different outcomes.

But that comes later. For now, try switching to manual and using your light meter to play around. Use different combinations of settings for the same scene and then decide — which is best? Why? As you begin to grasp exposure, you begin your journey of discovering your own vision for your work.

For more on travel photography, check out MatadorU.

Discover Matador

Save Bookmark

We use cookies for analytics tracking and advertising from our partners.

For more information read our privacy policy.