THIS PAST WEEK it rained in the Smokies on and off for several days, including the night before we visited Great Smokies National Park.
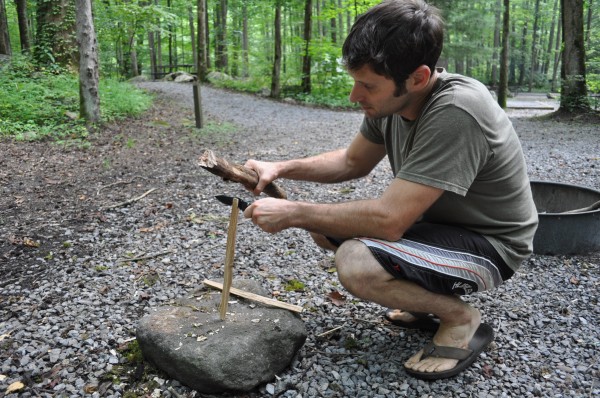
While several at our campground were failing to get fires lit — struggling even after dousing their dry, store-bought logs with lighter fluid, (grinning at the flare-up, then frowning as the flames died out) — my kids and I found all the materials we needed right there in the forest and had our fire burning cleanly in 20 minutes.
I’m going to break how we did it into the following 5 steps, but I’d like to emphasize something first. If there’s one overarching “step” here, it’s adopting a mindset about fire: Don’t think of fire building as strictly a “skill” but more a point of entry to knowledge about plants and trees.
Ultimately, they’re the materials of our fires, and so their names, their preferred habitat, whether they resist rot, whether their heartwood turns to pitch, whether their smoke is poisonous, whether they tend to hold onto their dead limbs or if their limbs contain usable inner bark, etc. — these are the true “lessons.”
After 25 years of such lessons in Southern Appalachia, I’ve found that building fires everywhere else I’ve lived or traveled — from the Pacific Northwest to Colorado to Patagonia to the jungles of Central America — leads to a kind of insight or perhaps even vague “familiarity” with the new terrain. For example, I’ll see a strange tree, but something about the way it grows, or maybe the way its bark remains strong and ropelike even after I break off a branch, will remind me of a tree somewhere else. Can it be used in a fire the same way? Let’s find out.
These instincts and observations become your ultimate teacher.
1. Forget lighter fluid, newspaper, etc. and bring your knife.
One of the most fascinating truths about the Earth is that it always provides.
Whether it’s building materials, food, or materials for a fire — wood, kindling, and tinder — each environment already produces exactly what you need, in a way that’s “custom made” for the place and superior to anything you could possibly bring into it.
A good example of this is paper. Yes, paper can be shredded, wadded, or rolled into tinder to start a fire. But have you tried that on a rainy Southern day with 100% humidity? The paper quickly absorbs the moisture and becomes useless. Meanwhile, within the bark of trees all around you stands the real tinder.
The key is knowing where to look for and how to harvest the materials you need. And so for this first step, remember: Bring your knife. As we’ll see in the firewood gathering section, a small hatchet can also make getting materials much easier.
2. Gather materials: Look up!
It’s natural to search for firewood on the ground. Gravity pulls materials to the forest floor and we look there. Oftentimes, however, grounded materials are either wet or decomposing. It may seem counter-intuitive, but when looking for firewood, look up. Study the canopy. Especially in non-winter months, when trees still have their leaves, it’s easy to pick out standing dead trees or branches.
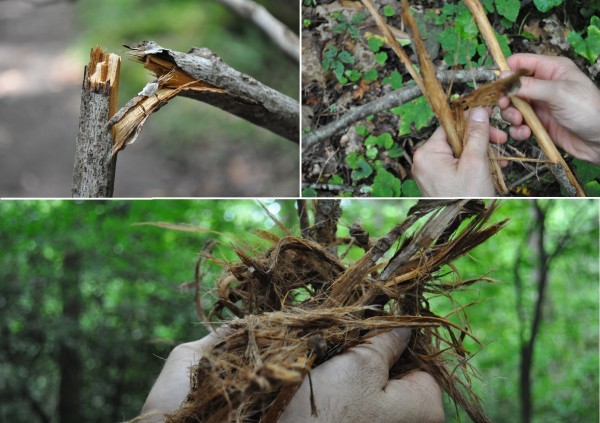
This is also where knowledge of trees comes in. Certain species such as Eastern hemlock (Tsuga canadensis), tend to hold onto their bottom-most dead branches. Tulip trees (Liriodendron tulipifera) tend to drop large branches that get hung up on lower branches and can easily be pulled down.
As opposed to spending time gathering dozens of different sticks from the ground (which may then be difficult to bundle / carry, and in the end not burn as well as drier fuel), spending that same amount of time looking for one large branch you can harvest may be more efficient.
Oftentimes the real “gift” branches contain everything you need in one piece: thick areas of the branch that can be broken / split up with a hatchet, gradually tapering into thinner pieces that can be used for kindling and even twigs that can become part of your tinder.
3. Cut / split larger pieces into more burnable sizes.
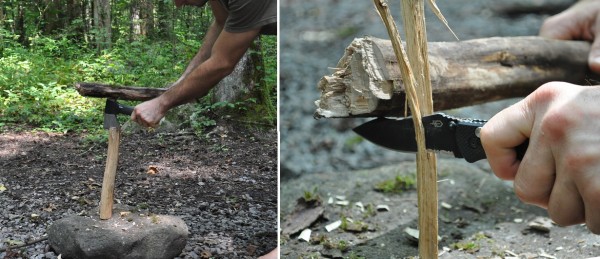
One of the most common things you see at campgrounds are stacks of logs way too big to burn without huge fires. Use your knife and hatchet to split not just log-sized pieces, but quarter-logs all the way down to matchstick-width pieces.
There’s a certain flow to simple work like this, and it can be done very safely as long as you always cut away from yourself and never force or muscle anything. Let the blade do the work.
4. Obtain proper tinder.
As you’re searching for and working with materials, consider also what you’ll be using for tinder. While living in Colorado, I found the environment so dry that often a few handfuls of dry dead grasses would be all I needed to ignite whatever twigs of pine or fir I set up.
In the South, however, it’s so humid that you need tinder which won’t just flare up and disintegrate, but instead continue to burn stably for 30 seconds — long enough to fully ignite the first layer of twigs.
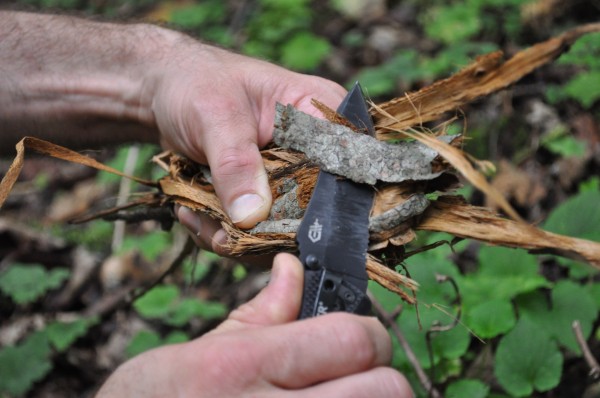
Although there are many other varieties of tinder, I like to find inner bark from tulip trees or basswood, which are common throughout Southern Appalachia.
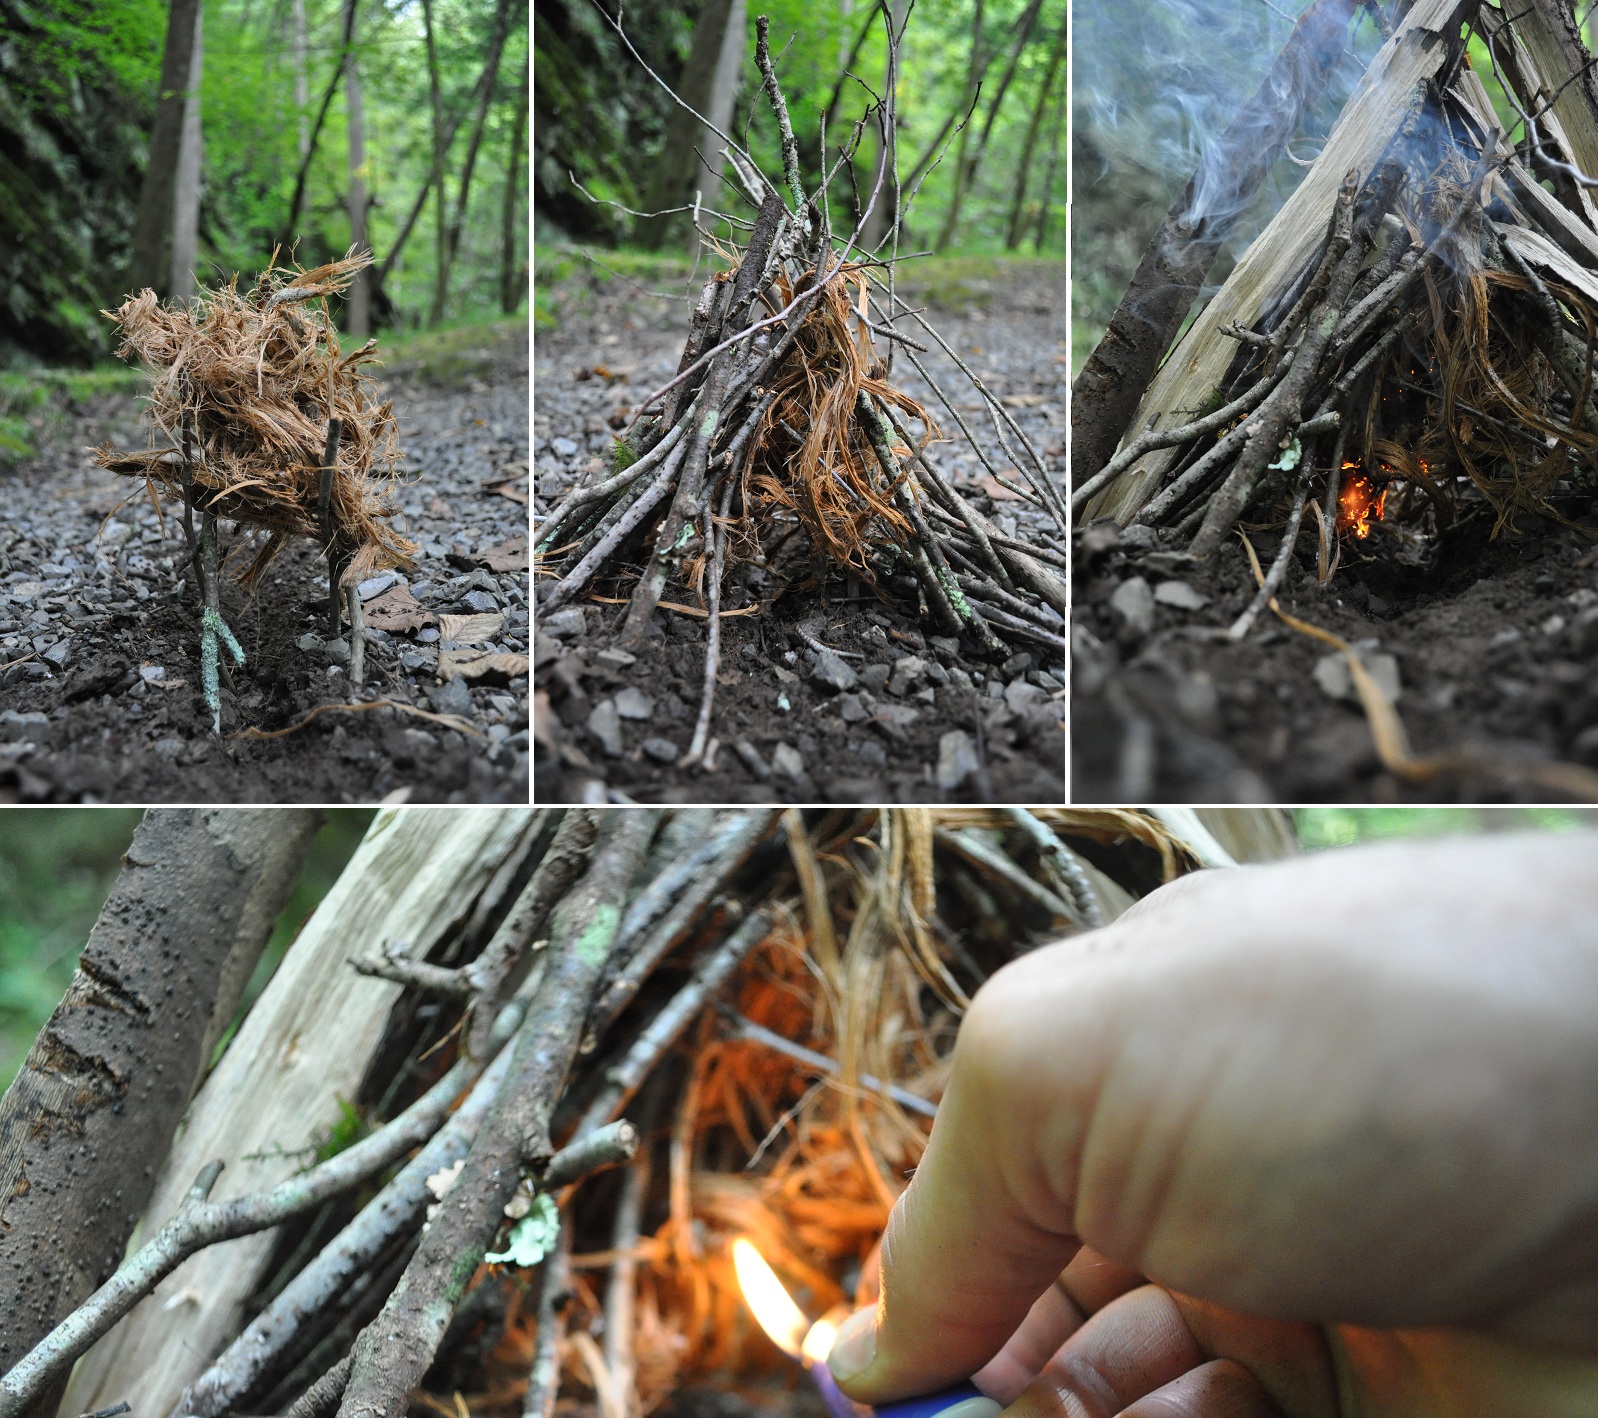
Cut away thicker outer bark with your knife, and then use a combination of rolling, shredding, and separating fibers with your hands to eventually create what looks like a disorganized bird’s nest.
5. Choose site and build pyre.
Once you have your materials gathered and ready, consider your site. Which way is the wind blowing? Will the smoke be trailing downwind into your camp? Are there walls, reflector stones, or other large surfaces you can set your fire near to help reflect heat?
With these thoughts in mind, begin building your pyre. There are lots of different methods, but all successful pyre constructions do the same thing: they create airflow beneath and up through the fire.
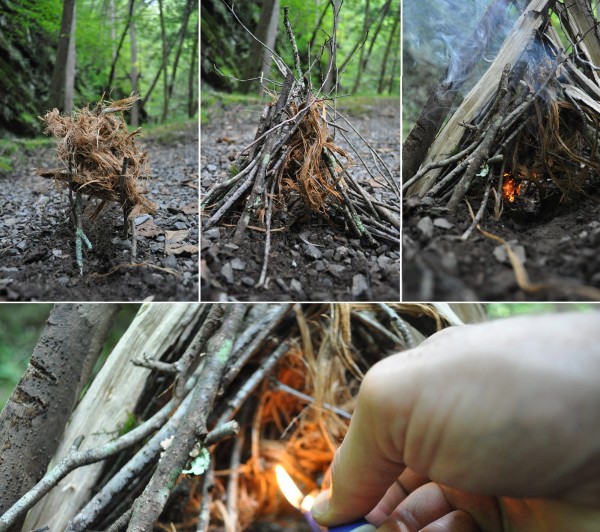
To make sure I have plenty of airflow as well as room to light the fire, I like to excavate a small passageway beneath a crossed pair of sticks, then set the tinder ball on top.
Once you have your tinder ball set up, test to make sure you can get your hand both in for lighting as well as withdrawing it without disrupting the structure.
Next, begin leaning in your smallest, driest twigs and kindling up against the tinder ball. This will become the “inner tipi.” Be sure you add enough fuel so there’s plenty for the tinder to ignite, but keep it open enough so that there’s still plenty of airflow through the tipi.
Now that the inner tipi is built, add a half dozen of your split logs and bigger material as a kind of “outer tipi.” This can be especially important if there’s a lot of wind: the outer tipi still allows air to flow through the fire but keeps the flames concentrated in the inner tipi to help the fire catch.
If the tinder seems to be burning sluggishly, try leaning in close and blowing a slow steady stream of air through it. Once the fire begins to catch and strengthen on its own, it can be — especially if you’ve taken your time building the pyre — a beautiful moment. As opposed to just throwing a bunch of sticks together and dousing them with lighter fluid, your fire contains a kind of story. You can trace back each piece to the places in the forest where you found them. It can be a form of travel, a ceremony in itself.
This post was produced in partnership with our friends at Gerber, whose gear is stoking out the Matador Ambassadors.