I had no house for over 2 years during my early 20s — I just didn’t care for the associated baggage, like rent and contracts. I also was put off by the environmental issues that came with most houses, and “green” building seemed something only accessible to elites. So I chose a “houseless” life and loved the freedom it gave me. I just woke up each morning and did what I wanted to do.
Then one day I was volunteering at a Buddhist eco-orphanage in Isan, Thailand, and I saw someone building a hut for a monk with dirt “adobe” bricks. She invited me to help. The work was fun and creative, there was basically no environmental damage done, and the cost was just a few months’ salary for a Thai farmer and just a few days’ for many Westerners. Since that day, I’ve become a convert and evangelized for the gospel of adobe.
I wanted to build more so she put me in touch with her teacher, Jon Jandai, a charismatic Thai farmer with no money, and yet he has more houses than he can count. After spending very little time with P-Jon, (“P” is a title of respect in Thai), I changed my questioning from “Can this be done with dirt?” to “ How do I do this with dirt?” Life put me on a small detour, but four years later, with the help of former Matador editor Tim Patterson, I began building my own adobe house. With zero formal training and about US$250, we had a very livable hut in one month.
Earthen building takes minimal time to learn, but a lifetime to master. I have since improved my building and design skills. I have six separate buildings, and my latest creation is an office with built-in loft, bookshelves and storage, a custom round work desk, and a balcony with double-helix-shaped supports. Grand total…US$750, which includes lights and decorations.
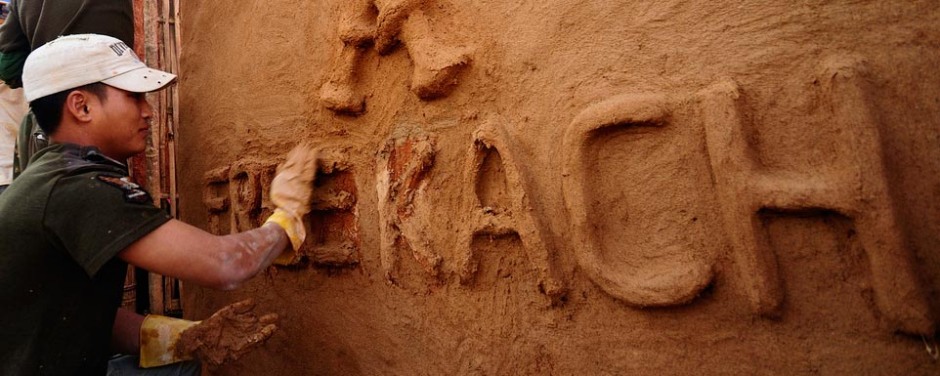
For over three years now my partner, Non, has been a full-time natural builder and teacher, or as she puts it, “dirt head.” We pair up on many projects, such as building adobe schools for Kachin refugee kids from the ongoing civil war in North Burma. Non is starting a foundation called Earthen Abode to teach and build in Thailand’s many neighbors, including Burma, Laos, and Cambodia. Right now we are in Tibet helping to build a traditional ram-earth Tibetan two-story house. The more I build and see earthen buildings, the more I want to build and share the good news.
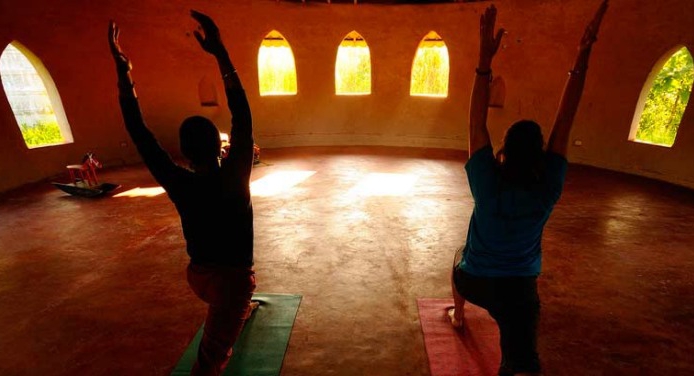
Kahlil Gibran wrote in his masterpiece The Prophet, “Your house shall be not an anchor but a mast.”
1
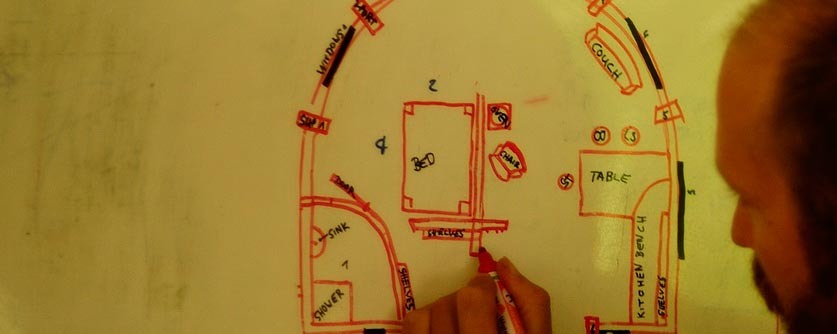
Step 1: Design
Your imagination is the limit. When building with earth, any shape is possible. Show the drawings to your friends for feedback. • Materials: Pen & paper• Cost: $0-1 -- Many of my house designs were made on the back of junk mail or cardboard boxes.
2
Step 2: Bricks
Wet the ground a day before, dig it up, mix husks, and add more water. Dance on the mix for 5 mins. Put in a homemade form (10cm x 20cm x 40cm works best for most situations). Let dry in the sun for a week.• Materials: Garden hoe, dirt, rice husks or straw• Cost: $0-20 -- Many farmers will give you husks for free or next to free.
3
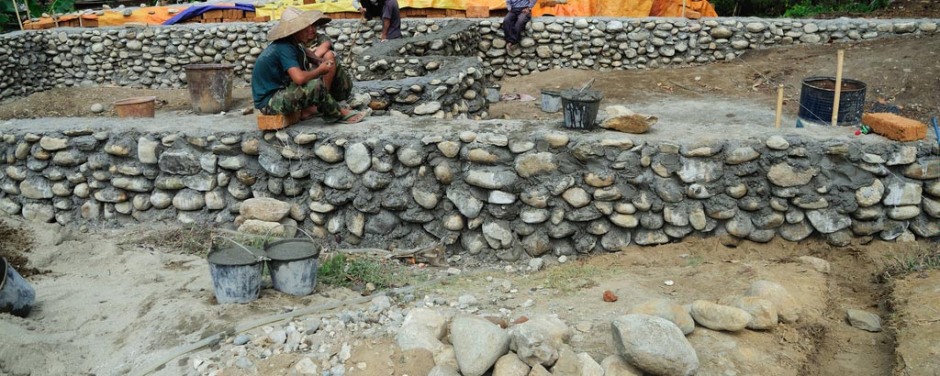
Step 3: Foundation
With a few hours' studying time on the internet and many large rocks or a few bags of cement, anyone can make a decent foundation. Dig into the ground about 10cm and use the bricks to make a form that rises out of the ground 20cm. Using large rocks looks very nice and minimizes the amount of cement you need, if any.• Materials: Rocks and/or cement• Cost: $0-50
Intermission
4
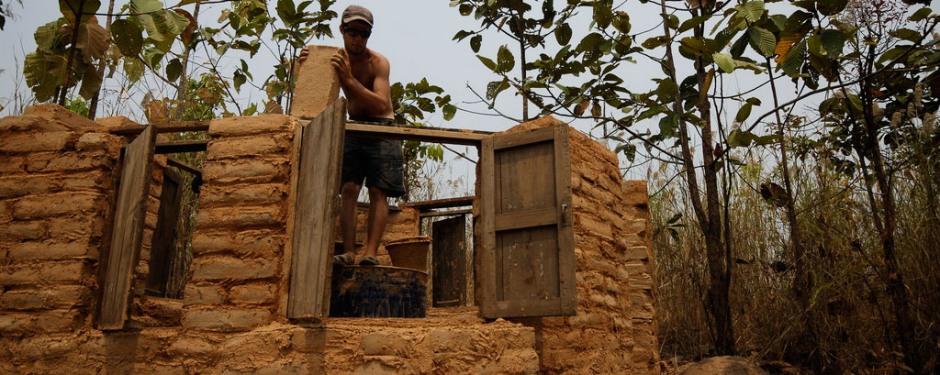
Step 4: Walls!
This is when your dream takes shape. Build layer by layer using the same mud mix used for the bricks as mortar to hold it all together. Can build a meter tall per day. For most adobe huts, the walls are done in just three days! To make sure the walls go up straight, use a homemade plumb-bob (i.e., heavy nail tied to a string). Note: For supporting the window and door openings, the free way is building arches with the bricks. Not hard and looks very nice too. Or go to the junkyard and buy a few pieces of scrap metal or wood to support the bricks above the opening.• Materials: Bricks, mortar, plum-bob (homemade)• Cost: $0
5
Step 5: Doors and windows
This depends a lot on your climate and location. Many of my buildings have no doors or windows, just open spaces for light, wind, and people to move in and out. There are many options for DIY windows and doors. Building with bamboo and using old bike tubes to spring-load the door closed, for example. If you like glass, the glass itself is actually very affordable -- then just make a frame yourself or build it directly into the building.• Materials: Your imagination is the limit.• Cost: $0-100
6
Step 6: Furniture
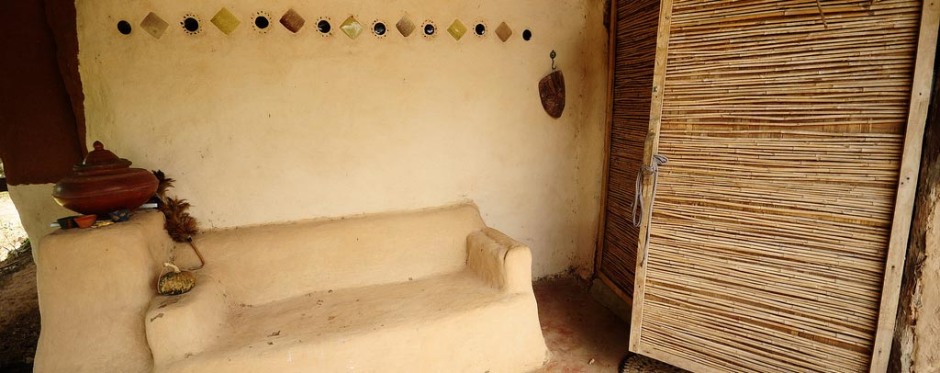
With adobe, I usually build the bedframe, bookshelves, benches, storage areas, and desks right into the building with the bricks I made. A lot of fun and looks nice. Also, the more built-in furniture you make, the stronger the whole structure becomes.• Materials: Bricks and mortar (optional is scrap metal or wood to support things like wide shelves in a bookcase)• Cost: $0-20
7
Step 7: Roof
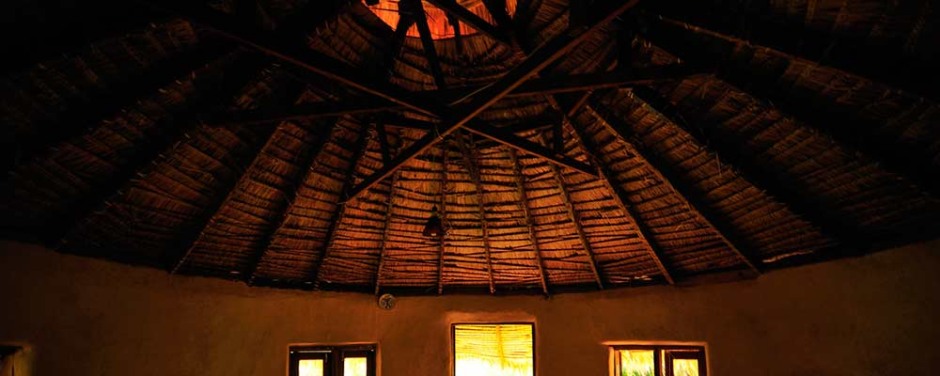
This is usually the hardest part to do for totally free, but it's possible. Bamboo rafters and a grass roof (yes, grass stops the rain -- even in a heavy monsoon downpour) is the best free option. Scrap metal rafters and a large tile or tin roof are the simplest to build and need little maintenance.• Materials: Many options• Cost: $0-250
Intermission
8
Step 8: Plaster
Plastering fills in any spaces and smooths the walls so they're ready to paint on. For plaster, I like to use topsoil, (soil with fewer husks and the addition of some sand also works very well). Many methods of making plaster exist. If you use your hands, you get a nice handmade look. If you use a trowel, you can get a smooth, professional look.• Materials: Soil and maybe sand• Cost: $0
9
Step 9: Painting
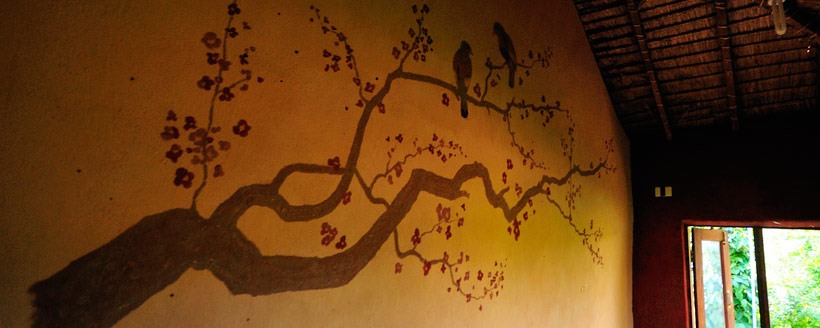
Yes, even the paint you can make yourself. Painting the house with your bare hands and paint made from soil, sand, and flour is the final and funnest step. The paint color is decided by the soil and sand you use. There are many colors to choose from: Reddish soil, pale light brown soil, and dark chocolate soil all exist and are not that hard to find. If you're lucky, you may even find yellow, red, white, or even purplish soil.• Materials: Soil, sand, flour (tapioca or wheat)• Cost: $0-2 -- As you need less than a 1kg of flour, it's probably already in your kitchen.
10
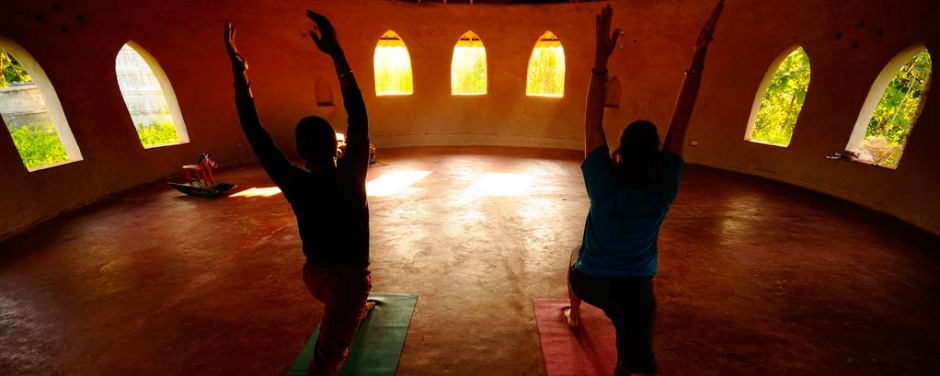
Step 10: Enjoy
Adobe building takes a minute to learn and a lifetime to master. I have built over a dozen houses now and helped with many others. Each time, my design and technical skills grow, but my first house (pictured above) is still good and holds a special place for me. Owning a house that fits my needs perfectly and not having a mortgage gives an incredible feeling of freedom that has enabled me to do many things in my life. I hope you'll try it too.