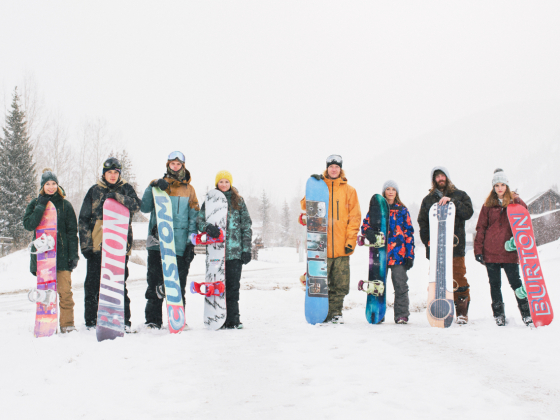
AS WITH ALL ADVENTURE SPORTS, snowboarding is about progression. As you study the snowboarding tips below, consider progression not just in terms of learning skills but appreciating your time out there on the mountain.
Too many kids, however, interpret progression as a micro-focus on skills — particularly freestyle — and start off snowboarding only to end up doing endless laps at the terrain park and getting hurt or frustrated. To apply an old surfing adage to snowboarding: The best snowboarder is the one having the most fun. The goal here is having fun not just for a season or two, but as a progression over a lifetime.
Beginner snowboarding tip 1: Protective gear isn’t just about safety; it makes you learn faster.
If you’re learning to ride as a young (school-age) kid and have a kid’s ability to naturally bounce off the ground and not get hurt, you can skip over this (except the helmet). But the #1 thing I tell adults learning to snowboard is “get wrist guards and lacrosse shorts.” Both can be purchased inexpensively at a major sporting goods store like Dick’s.
Lacrosse shorts are basically bicycle shorts with removable pads that protect the hips, crotch, and thighs, and most importantly have a thin plastic shield over the tailbone. Mine is set up so all the pads are removed except for hips and tailbone. There’s no loss of mobility; if anything, they feel nice and snug under my snowboarding pants.
When you’re buying wrist guards, take your mittens with you — if possible, choose mittens that cinch farther up your arm and close with an actual strap or cord as opposed to just an elastic band. This style of mitten accommodates wrist guards comfortably underneath.
Bottom line: Your first days on the mountain = falls on your butt and on your hands, over and over and over. If it starts to hurt, this can make learners timid, which just slows down the learning process. Having protective gear makes these falls no big deal; you just get right back up and try again.
And let’s just assume you’re not going anywhere near the hill without a helmet.
2. Avoid learning in “boilerplate” conditions.
Learning to ride in hard/icy conditions may be a rite of passage in certain parts of the world (I’m lookin’ at you Northeast), but it’s also largely avoidable depending on the time of day and year. For example, once spring conditions arrive and snow melts in the afternoon and refreezes at night (and into the morning), just wait to begin your lessons/practice until the afternoon when it softens. If it’s the middle of winter and there’s been no new snow for three weeks, plan to visit the hill the next time there’s fresh snow.
An important part of your progression is dialing in your knowledge about the conditions. Check the conditions report before you head up to the mountain.
3. Follow the powder.
If ice is to be avoided, powder is to be sought, always! As soon as you can make turns you’ll understand why. Powder is magical. It allows you to make weightless carves as if you were surfing. It turns little creek beds and gullies into mile-long half pipes.
What do you see when you go to the mountain, though? The majority of people follow each others’ tracks. They stay on the same predictable groomed runs and moguls. And in doing so they miss interesting possibilities for connecting runs together. They miss the pow! If you’re constantly looking for untracked snow, it will lead you to more creative lines, and help you progress to new terrain more rapidly.
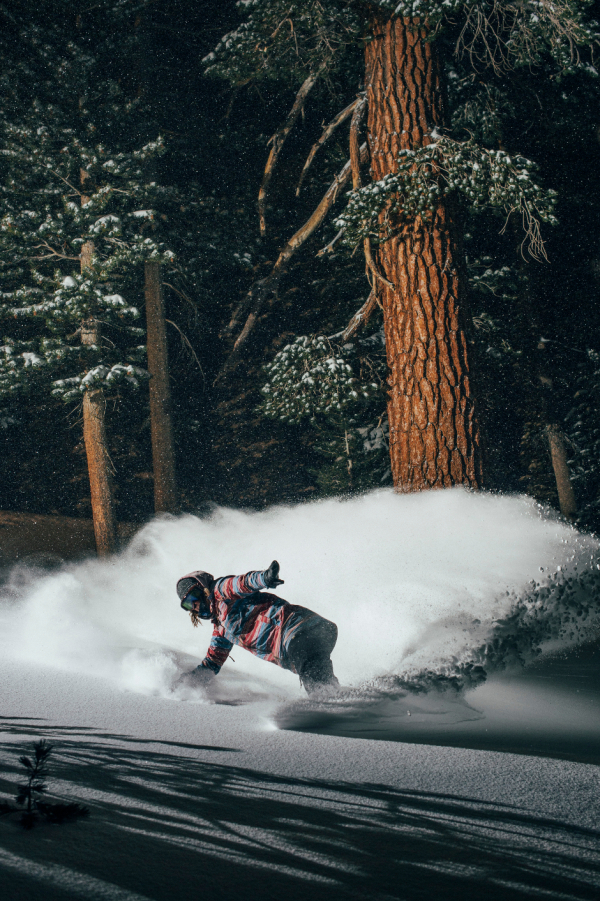
Enni Rukajärvi riding at Mammoth, March 2014. Photo: Dean Blotto Gray, via Burton
4. Look where you want to go.
Let’s put the above “follow the pow” mindset into technical terms: Wherever you look is where you’ll go. Your eyes lead the rest of your body. You can practice this right now just by standing up as your read this. Put your feet in a shoulder-width snowboard or skateboard stance. Raise your head so you’re looking forward. Relax your shoulders; let your arms dangle loosely. Now, look left and turn your head 90° to the left.
What happens to your shoulders? Do you feel a subtle weight shift in your feet? Your right shoulder should now be turned halfway between your feet. Next, keep rotating your head and shoulders to the left until your head is approximately 180° looking behind you. Notice how this is loading up weight on your heels?
Now rotate slowly and smoothly, starting with your head, looking back to the right. Rotate all the way around until you’re looking 180° over your right shoulder. As you swing back around, notice how the weight unloads from your heels and loads up onto your toes.
This is the foundation of edge control. It all starts with where you look, and then this translates into weight shifts between your heels and toes, and ultimately your whole body. If you practice this in your living room, visualizing how you turn back and forth from toeside to heelside, it will actually make you learn faster.
5. When you do your first turns on the hill, overemphasize the push on your heels and toes + body rotation.
When trying to do their first turns, most beginner snowboarders will give a timid lean and then “wait” for something to happen. Inevitably this throws them off balance because their boards aren’t initiating the turn in accordance with the lean. Being out of balance, they fall.
As you approach a turn, instead of the “lean and wait,” really overemphasize a deliberate push with either your heels or toes, depending on which way you want to turn.
Everyone starts out with their weight on their heels, boards plowing down the mountain. The move then is to gradually take weight off your heels to straighten out the board. This is the point where you either fall, or quickly overemphasize that push — either back to your heels to get the board plowing again, or continuing with your toes all the way through a turn to toeside.
It may look and feel a bit goofy at first, but as you’re pushing extra hard with your heels and toes, help your body (and board) rotate by swinging your arms around your torso in the direction of the turn. As you progress, it will all begin to feel less like you’re “forcing it.”
6. Practice in your yard or living room.
Even if you’re not on the mountain, you can practice the last two points and begin to get those weight shifts into your muscle memory simply by practicing out in the yard or in the living room. If you’ve got boots and a board, don’t leave them in the closet — strap in and practice! You can do full transitions / weight shifts from heelside to toeside, and once you get that down, begin practicing how to manual (or ‘butter’) your board, balancing on the nose or tail. You can practice ollies and nollies. The key is to learn the balance points and flex of your board.
7. Look for banks and walls.
One of the biggest ways to ramp up your progression is to always be looking for banks and walls for your turns. These can be found not only on terrain park features (half or quarter pipes) but anywhere two slopes intersect. A great place to find them is along roads, which typically form sloped walls on their uphill side.
The more you look for them, the more you’ll start seeing them everywhere — forming off boulders, creek banks, and at the intersections of different slopes. Start by turning slowly on banked walls, then gradually go faster and faster until you’re hitting them so fast that at the apex of the turn your body is parallel to the ground. Once you reach this level of speed and control, it opens the door for airs and a whole next level of progression.
8. Stay warm and look cool!
Because riding is a stop-and-start activity with periods of high exertion (riding) followed by rest (riding lifts), it can be difficult to regulate your temperature and stay comfortable. Nobody is having fun if they’re cold! Don’t skimp on your outerwear; buy (or borrow) a good, ventilated parka or shell. Make sure it has a hood that easily accommodates your helmet when you get cold.
The last of these snowboarding tips? Remember that snowboarding is all about style. The lines you find, the tricks you land, even just the simple way you carve, it’s all a creative expression. What you wear is an extension of that style. Go rock something you feel good about, and it all just adds to the fun.
Note: This article with snowboarding tips has been updated; it was originally published on December 2nd, 2014. ![]()