Photo: Creative Cat Studio/Shutterstock

Travel Photography Tip: Cleaning Your Gear on the Road

Travel
by Kate Siobhan Mulligan May 30, 2013
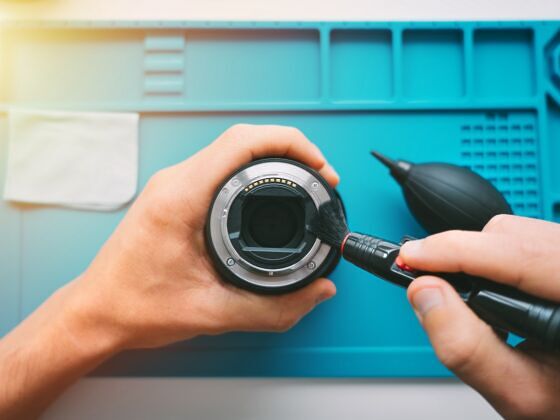
The MatadorU Travel Photography course teaches a range of skills, including gear maintenance tips like those below.

You’d be amazed how fast a few grains of sand can take down an entire lens. Caring for gear on the road is vital, then, but often done poorly, which can actually cause further damage — spitting into your shirt and giving it a swipe will not suffice.

Here are a few accessories that will help keep your lenses clean in the field:

Filter: If you’re going to invest in a lens, invest in a UV filter too. Aside from UV, they protect against bumps and scratches that would otherwise hit your lens. In my opinion, you shouldn’t drop good money on a lens and then pair it with a crappy filter, as it’ll degrade the image. That being said, you can always remove the filter to shoot (to get the most out of your glass) and reattach when you’re done.

Cap: Always cap your lens when not in use, unless action is breaking out all around you. Anytime you move your camera, or are moving with it in tow, cap it. Just make it a habit.

Hood: A hood for your lens, aside from blocking rogue sunbeams looking to work their way into your image, also protects against bumps. Without it, the edge of your lens would take the brunt of the blow.

Bag: If you’re caught in the rain, any plastic bag will protect your gear. Always have a garbage bag in your kit just in case. But you can also purchase rain covers for your camera that have a tighter fit and space for your hands, from $15 to $200. Check out Think Tank, Vistek, Kata, Amazon, or your local store.

* * *
Now let’s say you did your best, but your lens has somehow gotten dirty. Here’s what you need to bring it back to life:

Examination: That’s right — look at it. We spend so much time looking through our cameras, and looking around at where we are, but spend so little time inspecting our gear before (or after) a shoot. Look at your lens. I’m amazed at folks who drop a few thousand dollars on a lens and then cover it in fingerprints and wonder why it’s “not sharp.” And if you have a filter on it, chances are there’s a nice layer of dust under it and fingerprints on the filter itself.

Blower: A squeeze-bulb blower is an oblong rubber orb that you compress to puff air out a tube on one end. This airflow can dislodge any larger items from your lens (and in a pinch, your sensor too, but be extremely careful). You can also blow air around your buttons, dials, and viewfinder. Cheaper blowers can actually suck in the dust and blow it back out, so invest in a good one, as from Giottos.

Brush: The main thing to remember with a brush is never to touch the bristles. Usually brushes come contained in a twist or push-pull system, wherein it’s protected when not in use — keep it that way and always store it properly when done. As with a blower, a brush can be handy to clean up after, say, a long hike or day at the beach, to ensure no nasty granules are hanging around.

Cloth: Not your t-shirt, not your sock, not your quick-dry towel, but a micro-fiber lens cloth. Invest in some really good ones and keep them separate from the rest of your kit, like in a ziploc. Wash every now and then in your sink. Avoid using them to clean anything except your lenses. Start in the middle of your lens, and in circles work your way to the edges. Pay attention! Feel with your fingers that there’s nothing under or in the cloth that could scratch the lens.

Wipes: Pre-dampened lens wipes can be helpful in a pinch, especially after particularly grimy days (e.g., Holi in India). Always blow or brush first to get rid of major residue, and then let the wipe do its job on the finer stuff, like fingerprints. Be sure to let them dry or else the moisture will just adhere more dust to the lens.

Fluid: For a really deep clean on your lenses, bring along some alcohol-based lens cleaning solution. Purchase from a reputable store and always get name brand. Always apply to a cloth and not to the lens, and then wipe gently in a circular motion to the edges. You need a clean cloth and very little fluid.

A note about sensors

Cleaning your own sensor is up to you. Some do, many don’t. The safest method is to ship the camera to your manufacturer for an official clean. Stores offer this service too, but just be sure you trust the technician.

When on the road, unless you can see a massive hair across your images, it’s probably best left until you’re home. If you can’t wait, either research when you’ll cross a professional camera store, or pack a sensor cleaning kit.

Warning: If you damage your camera while cleaning it yourself, it can void your warranty.

Never clean your lens with:
  • tissue paper
  • paper towels
  • a shirt
  • facecloths
  • towels
  • really, anything not listed above…even something like tissue paper can scratch your lens.

While caring for your lenses and gear is important and often overlooked, don’t be afraid to handle your camera. Just be sure to treat it right when you’re done. * MatadorU will teach you the skills you need to become a travel journalist.

Discover Matador