Photo: Ryszard Filipowicz/Shutterstock

How to Set Up Your Bike for Touring This Summer

Cycling
by Hal Amen Jun 3, 2009
Introducing the perfect recession-era summer vacation concept: a local bike tour.

AT MATADOR, we love bike tours. We’re talking zero fuel costs (well, maybe a few PowerBars), and if you bring camping gear you’ll avoid overpriced chain hotels. A two-wheel tour can also reintroduce you to your own backyard.

Best of all, setting up your bike for touring is easier than you think.
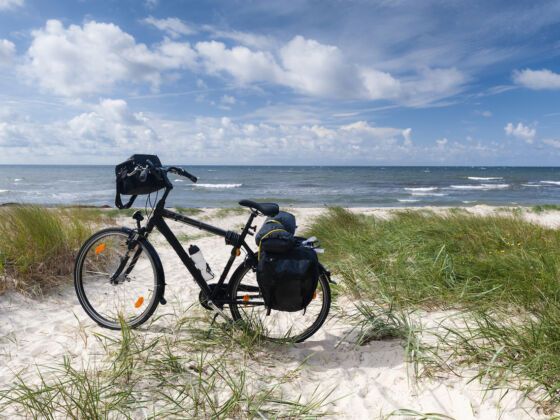
The bike

There are many touring-specific models out there. If you’re set on picking one up, check out this comprehensive guide on how to choose a touring bicycle.

But it makes as much sense to gear up your old mountain bike — even a sturdy roadie will do.

Mountain bikes make great touring frames. They encourage a more comfortable upright riding posture, accommodate thick tires, come with low gearing for sweating up hills, and can better survive abuse. Suspension’s also handy if you’re touring off-road.

Be more careful when touring on a road bike. Higher-end carbon frames may not be able to support a touring load.

Racks and panniers vs. a trailer

It’s possible to ride with a camping pack on your back, but this raises your center of gravity — awkward and dangerous. Shelling out for rack(s) and panniers or a trailer is essential. This will be your biggest cost in converting your bike for touring.

Trailers
If your bike is missing rack-mounting eyelets and a clamp-on rack won’t work for you, one solution is to pull a trailer. Trailers generally connect via a hitch attached to the rear axle, seatpost, or chainstays.

Pulling a heavy load behind your bike can take some getting used to, but many tourers swear by the trailer. The BOB Yak is one of the most popular.

Racks
If your bike has eyelets (threaded holes) on the rear dropouts, seat stays, and fork, you’re in luck. These represent the easiest way to mount rear and front racks.

But don’t despair if you’re missing the eyelets. Mountain bikes with front suspension, for example, aren’t going to have eyelets in the fork. There are ways to get around this, such as clamp-on racks or those that run a support skewer through the wheel axle.

Tubus racks are considered some of the best; the Cargo rear model can support 90 pounds. On the other end of the spectrum, you might be able to pick up discarded stock racks on the cheap from your local bike shop.

Mounting both rear and front racks gives you the capacity to haul two large rear panniers, a rack-top bag, and two smaller front panniers. If you’re looking to cut costs and can afford to sacrifice space, forgo the front rack. You can pile a lot of gear onto the rear — just be aware that it might affect the bike’s handling to have all the weight in the back.

Panniers
I’ve seen panniers of all price ranges on the road, from the waterproof and ultra-durable Ortlieb models to plastic garbage bags strapped down with bungee cords. Whatever works for you.

Don’t forget the handlebar bag!

However you decide to haul your gear, splurge a little more and get yourself a handlebar bag. These mount directly in front of you on the handlebars and give convenient access to items you’ll need frequently while riding.

Bigger isn’t necessarily better in this category, as more weight on the bars can affect steering control.

Tires and fenders

Touring tires should fall somewhere between skinny, treadless road tires and mountain bike knobbies. Widths from 28 to 35 (for 700c wheels) and something around 2.00 (for 26″ wheels) will work well.

Again, there’s more quality to be had if you’re willing to drop the coin. I’ve toured thousands of miles on my Schwalbe Marathon XRs and haven’t had one flat — not one.

Unless you’re in the desert, fenders are important for increasing comfort on the road. We’re talking full-length here, like those made by Planet Bike. Depending on your bike’s wheel clearance, you might need to step down a tire size to accommodate the fenders.

Tools and spares

It’s important to be self-sufficient on a tour; you never know how far out into the middle of nowhere you’ll be when a problem hits. Create a packing list before you head out, and make sure these are on it:

  • hand pump
  • computer — essential for following map directions
  • lights — if you plan to ride at night (or dusk)
  • spare inner tubes
  • lock(s)
  • spare brake/gear cables, spare spokes, spare brake shoes — for longer tours
  • a solid multitool, or the following:
  • Allen wrench set
  • screwdriver(s)
  • tire levers
  • chain tool
  • spoke wrench
Water

Even more important than those PowerBars is an adequate water supply. Many touring bikes have an extra pair of eyelets on the down tube for a third water bottle cage. If yours doesn’t, stow an extra bottle or two with your gear. A Camelback also works well.

Discover Matador

Save Bookmark

We use cookies for analytics tracking and advertising from our partners.

For more information read our privacy policy.