Astrophotography is the art of capturing photos of the nighttime sky. It’s like landscape photography, except it happens in the dark hours after sunset. This type of photography requires camera gear, know-how, and determination. You can start with the equipment you already have, but grit and patience are things that can’t be bought or taught — you must want it. By the end of this guide, you’ll be armed with a few simple rules and helpful apps, so you too can venture out and capture photos of the stars.
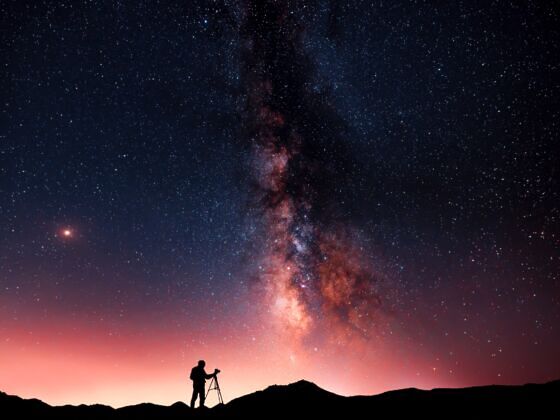
Photo: Jmykhailo pavlenko/Shutterstock
Everything You Need to Know About Photographing the Night Sky
My name is Jason Barnette. I’m a travel writer who started as a photographer. One of my favorite hobbies was capturing astrophotography. For many years, I used a simple prosumer-level camera and a third-party wide-angle lens. I aim to teach you how to capture stunning photos using similar equipment.
- Types of astrophotography
- Required camera features
- The best cameras for astrophotography
- The best lenses for astrophotography
- The best camera accessories for astrophotography
- Astrophotography apps for smartphones and tablets
- How to plan a astrophotography shoot
- Setting up the camera
- Camera settings for astrophotography
- How to focus on the stars
- How to capture nightscapes
- How to capture star trails
- Post-processing the photos
Types of astrophotography
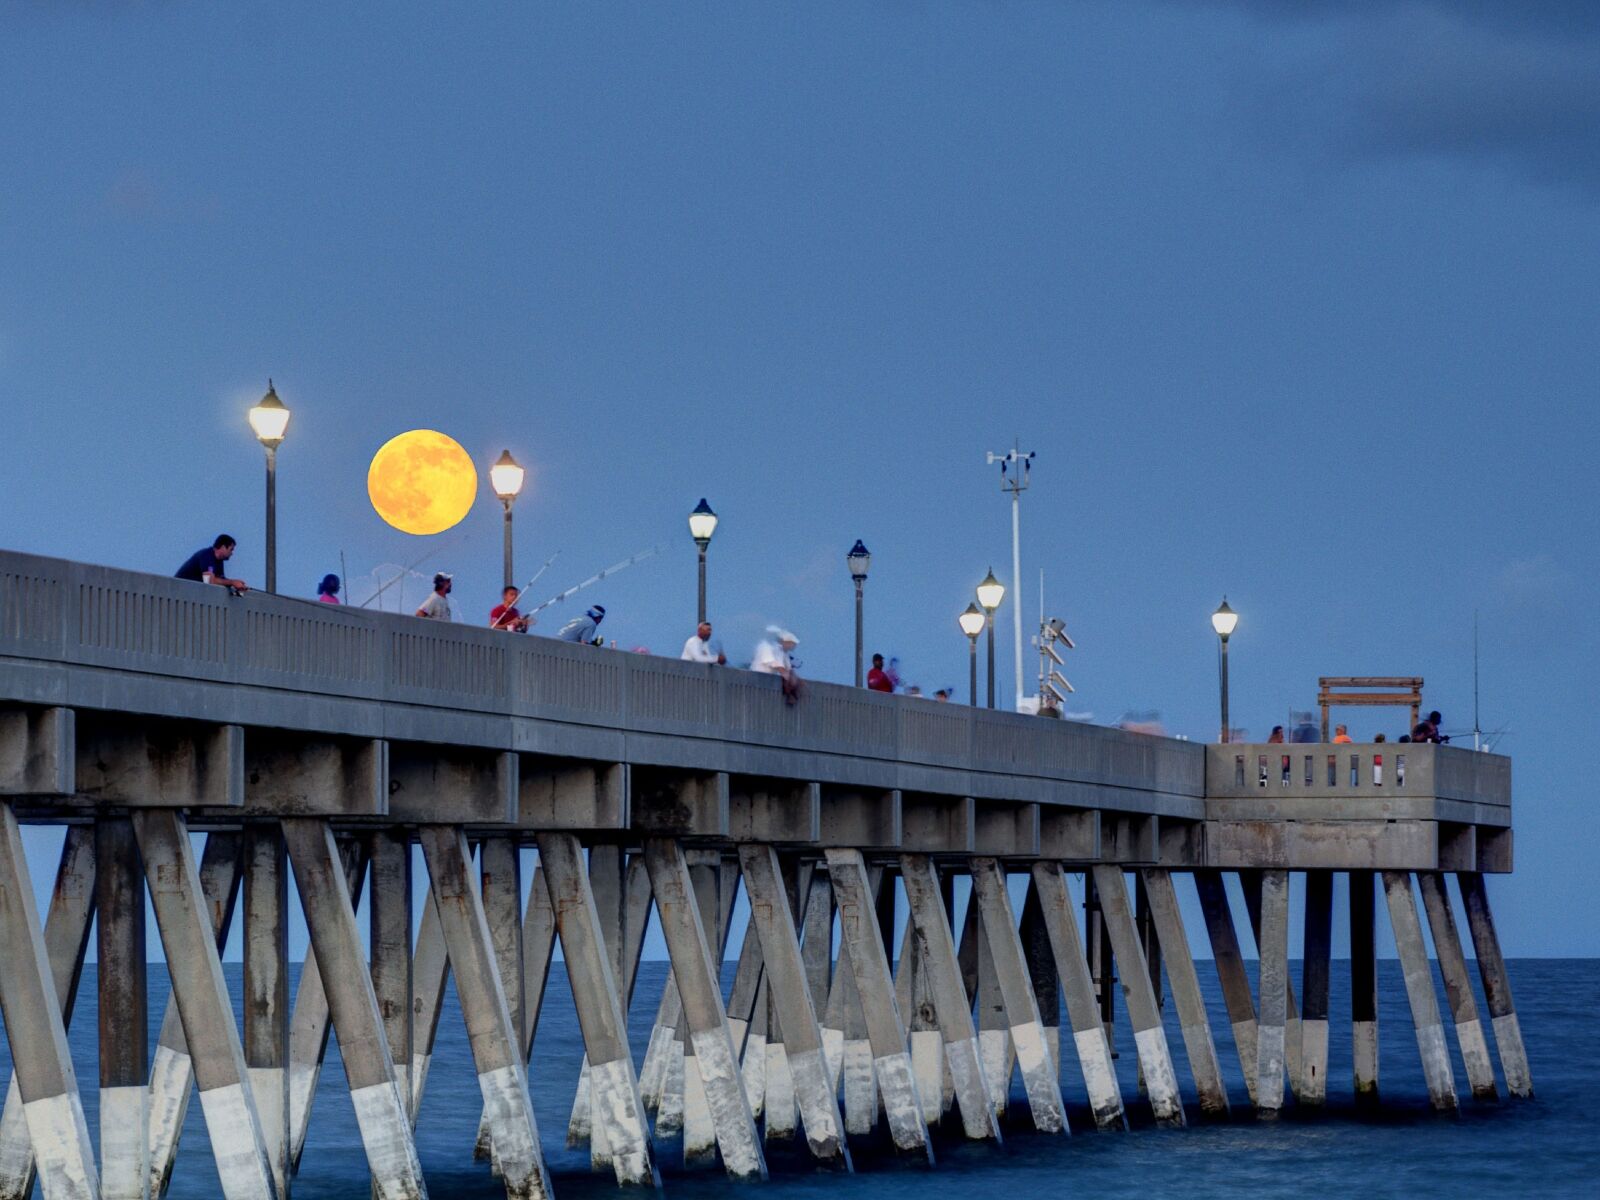
Photo: Jason Barnette
Astrophotography includes photos of anything in the nighttime sky — celestial events, planetary objects, and stars. The photos can be anything from a wide-angle view of the entire sky to a narrow view of the moon. For beginners, it almost certainly means you’ll be capturing nightscapes and star trails.
Here are the five types of astrophotography:
- Nightscapes: Photos of the nighttime sky that include landscape elements in the foreground. Requires a wide-angle lens and tripod.
- Deep space: Photos of nebulae and galaxies. Requires a telephoto lens or telescope and a camera adaptor.
- Solar system: Images of the neighboring planets and moons. Requires a telescope and a camera adaptor.
- Lunar: Photos of the moon. Requires a tripod and can be captured with a wide-angle, normal, or telephoto lens.
- Star trails: Long exposure photos that show the stars’ movement in the nighttime sky relative to the Earth. Requires a wide-angle lens and tripod.
Required camera features
Technology has come a long way since astrophotography was first captured on film. With today’s market of prosumer-level DSLRs and mirrorless cameras, the sky is the limit for capturing astrophotography.
There are three requirements for a digital camera:
- Interchangeable lens: A camera body capable of changing lenses.
- Low light performance: Capable of capturing high ISO photos with low digital noise.
- Capable of manual settings: Ability to manually set the camera’s settings.
Features like megapixels, video recording, and touchscreen are a non-issue for astrophotography. These are good features to have, but not necessary. Does your camera meet these requirements?
Beginner camera bodies
If you’re just beginning to capture astrophotography, I advise using your own camera. Astrophotography can become an expensive. But first, you must see if you have the determination for the time-consuming hobby.
These are the minimum specifications for beginner camera bodies:
- 12MP resolution
- ISO sensitivity 100-6400
- Bulb shutter speed
- Cropped or full-frame sensor
- RAW file format
Anything better than these settings, and you’re set to go. But if you’re in the market for a new camera, here are some budget options to get you started.
The best beginner cameras for astrophotography
We hope you love the gear we recommend. Just so you know, Matador may collect a small commission from the links on this page if you decide to book a stay. Listed prices are accurate as of the time of publication.
Canon EOS M50 Mark II

The Canon EOS M50 Mark II was announced in 2020. This is a great budget mirrorless camera with a 24.1 MP sensor and an ISO range of 100-25600. For about $500, it’s perfect for anyone needing a camera before they can begin astrophotography. The M50 Mark II with EF-M 15-45mm Lens is a great beginner’s kit.
Canon EOS R10

The Canon EOS R10 is more than just a beginner’s camera — for around $1,000, it’s a camera that can capture great photos in any situation. The mirrorless camera features a 24.2 MP sensor with an ISO range of 100-32000.
Nikon D5200

The Nikon D5200 is an entry-level DSLR with decent features for around $750. The 24 MP sensor with an ISO range of 100-25600 will be great for capturing night photos.
Nikon Z6

Introduced in 2018, Nikon’s mirrorless lineup has progressed quickly. The current Nikon Z6 II is an excellent camera, but it’s pricey. Fortunately, the newer models have driven down the price of the Nikon Z6 to about $1,000. The 25 MP sensor and ISO range of 100-51200 can capture crisp photos of the nighttime sky. The older model is priced at around $1,000.
Fujifilm X-T30 II

For $900, the Fujifilm X-T30 II is a great beginner camera for astrophotography. The 26 MP sensor and ISO range of 100-12800 can capture stunning photos of the nighttime sky. You can get the X-T30 II and XC 15-45mm Kit for an extra hundred dollars.
Fujifilm X-S10

The Fujifilm X-S10 is a powerful mirrorless camera for about $1,000. The 26 MP sensor and ISO range of 100-12800 is a good start in astrophotography.
Sony Alpha 6100

Sony Alpha mirrorless cameras offer a better sensor for low light conditions. The Sony Alpha 6100 features a 24 MP sensor with an ISO range of 100-32000 for about $750. Invest another hundred dollars and get the Sony a6100 with a 16-50mm lens.
The best lenses for astrophotography
Camera bodies are only as good as the glass attached to them. My first photography mentor once said, “If you buy a cheap lens, it’s like trying to capture photos with a dirty coffee filter.” The lens is the most essential part of the camera package.
It’s possible to begin astrophotography with the kit lens that likely came with your camera body. However, there are limitations to the quality and available light with these cheaper lenses.
Here are some guidelines for identifying good astrophotography lenses:
- Prime lenses are cheaper, lighter, and sharper than any other type.
- Zoom lenses with a fixed maximum aperture produce better results than those with a variable maximum aperture.
- The focal length needs to be around 12 — 35mm, but not a fisheye lens.
- The maximum aperture needs to be a f/4, preferably an f/2.8 or any number smaller.
If you want to upgrade your lens, here are two affordable options highly regarded by astrophotographers. Be sure to buy the lens with the same mount as your camera body.
Rokinon Series II 14mm f/2.8
The Rokinon Series II 14mm f/2.8 is widely considered one of the best prime lenses on the market. With a fast f/2.8 aperture, you’ll be able to capture more light. This lens is available for Canon EF, Canon M, Sony E, Fuji X, and Nikon F mounts.
Tokina ATX-I 11-20mm f/2.8

The Tokina ATX-I 11-20mm f/2.8 is a beast of a wide-angle lens. The fast f/2.8 aperture is great for astrophotography, and you’ll capture sharp photos of the pinpoint stars. But this lens is only available for Nikon F and Canon EF-S mounts.
The best camera accessories for astrophotography
Beyond the camera body and lens, there are a few required accessories for capturing astrophotography. And there are a few suggested accessories to make it easier and more enjoyable.
Tripod or stabilizer
All types of astrophotography require long exposures. That means the camera must be mounted to a tripod or other stabilizer to keep the camera absolutely still while shooting.

The Manfrotto Befree Travel Tripod is an excellent option for beginners. The compact aluminum tripod has a carrying case with a strap. The inexpensive $130 tripod comes with a caveat — a maximum height of just 48 inches. But if your camera body has a tilt LCD, the low height of the tripod might be acceptable.

My favorite alternative to the tripod is the Platypod Extreme. The innovative $150 Platypod is a metal plate with four adjustable feet. It’s designed to sit on uneven terrain and remain level. It’s a compact, lightweight alternative to a tripod, perfect for hiking to a shooting location.
Expert tip: Don’t extend the center column of the tripod. It may provide additional height but is less stable and more prone to shaking in a light wind.
Remote shutter release
Camera shake is the death knell of astrophotography. In addition to mounting the camera to a stabilizer, you’ll need a remote shutter release to trigger the camera without touching it. Some modern DSLRs and mirrorless cameras have smartphone apps. But for other cameras, you’ll need something like this.

The Pixel Wireless Shutter Release is a two-part system. The receiver mounts to the camera’s hot shoe and plugs into a camera port. The wireless remote triggers the camera. This model also features an intervalometer — a device that can be programmed to shoot a certain number of photos with a set exposure over some time.
Flashlight

One of the suggested accessories is a headlamp with a red light filter. Red light doesn’t affect our night vision as much as other wavelengths and won’t ruin your exposure of the photo. The Black Diamond Spot 400-R features a lithium-ion battery with a 400-lumen max output. The modes include full strength, dimming, strobe, and red light.
Extra batteries

If you plan to shoot for an extended time, you should consider buying additional batteries for your camera. But if you’re capturing photos of star trails, how can you change the battery without disrupting your photos?
Many mirrorless cameras can be charged via the USB-C port. You may need to buy an additional cable for your camera body. With the cable, you can use any portable power bank like the Anker 737 24000 mAh Portable Charger. This power bank could keep a mirrorless camera functioning for hours.
Expert tip: Keep the spare batteries warm inside your coat when shooting in a cold climate. Cold batteries don’t hold a charge as long as warm ones.
Astrophotography apps for smartphones and tablets
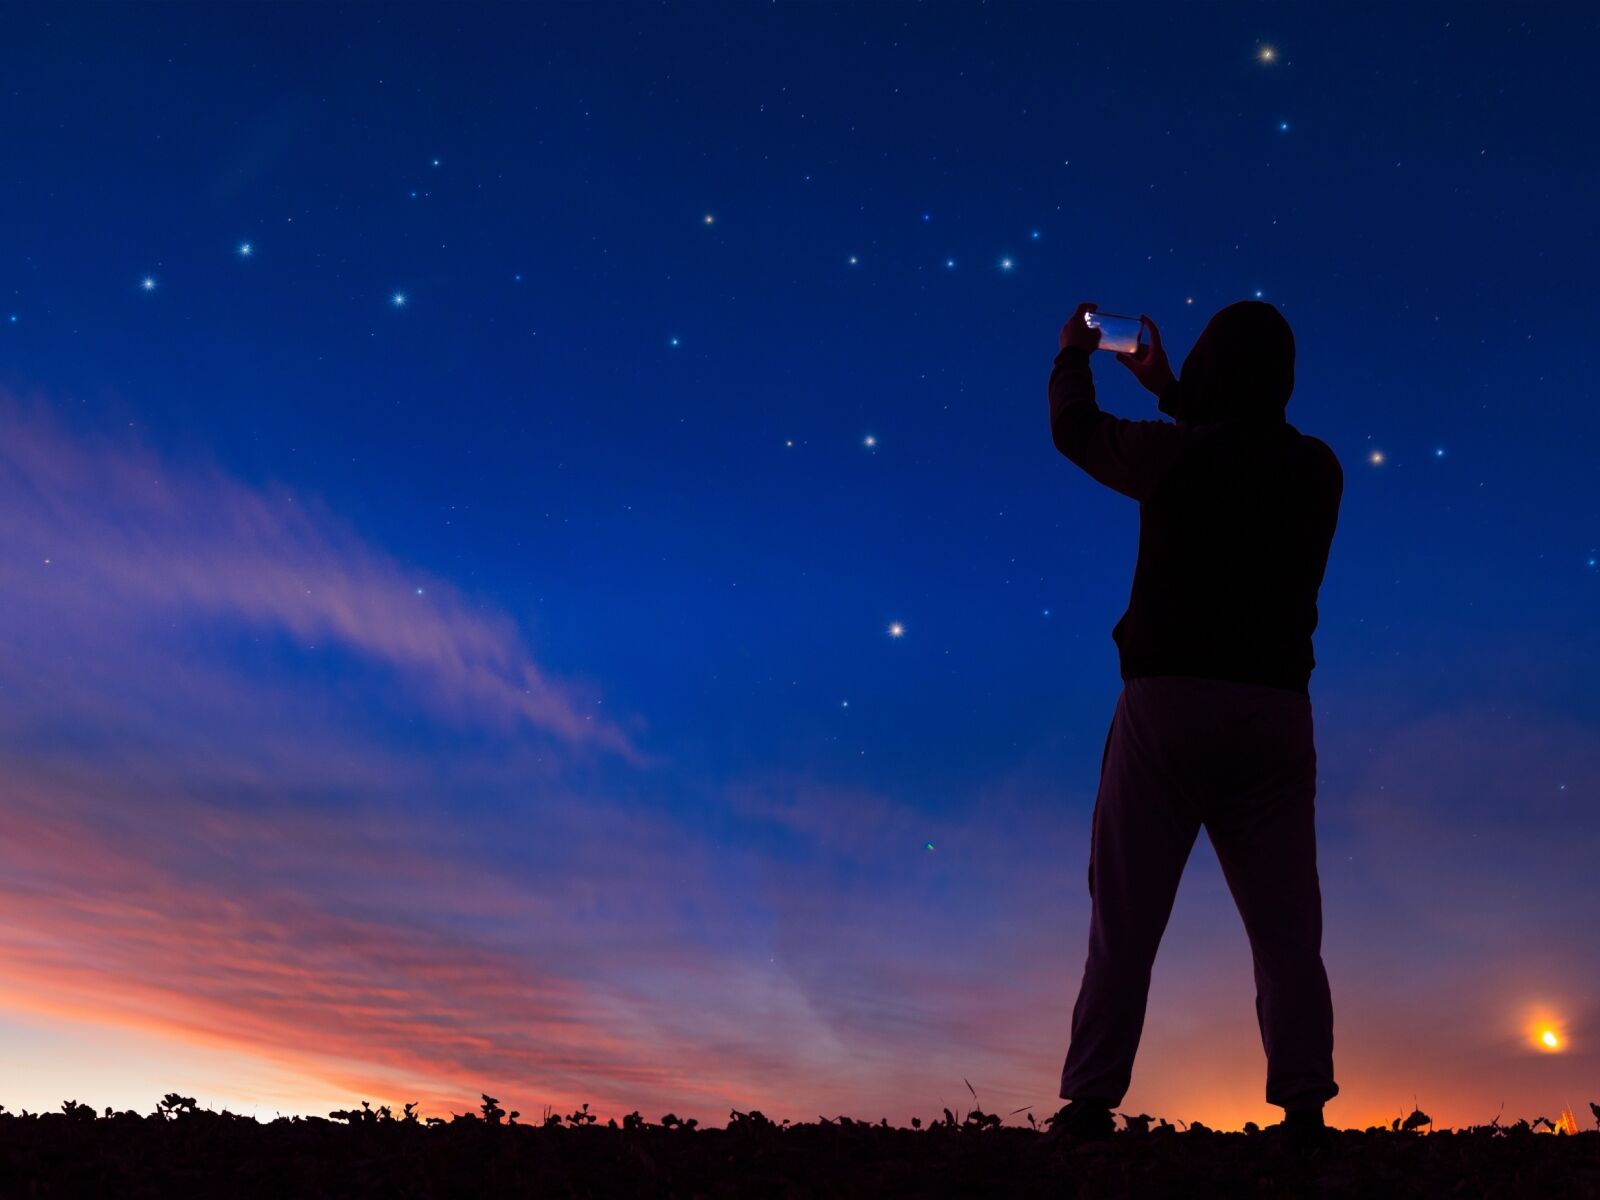
Photo: Jmykhailo pavlenko/Shutterstock
An astrophotography photo begins with a great plan. The night sky is constantly changing. So, to capture photos of particular celestial objects, you’ll need to know where and when to go. And once you arrive, you’ll need to know where to point the camera. These apps provide solutions to these issues.
The Photographer’s Ephemeris
The Photographer’s Ephemeris has been my favorite photo planning app for several years. The app uses Open Street Maps and astrological data to plot the position of the sun and moon relative to your position. This is instrumental in determining where the moon will rise and set and at what time.
For astrophotography, the app features essentials like the path of meteors across the night sky, moon positions throughout the night, and displays the Milky Way in 3D in augmented reality. You can easily change the time of day or date to see how everything changes in the future.
After registering for a free account, you can begin planning on the Photo Ephemeris desktop website. The PRO upgrade features Google Maps with Street View and additional astrophotography tools. The app is only available for iOS.
SkySafari 7
SkySafari 7 is a powerful app for MacOS, iOS, and Android that puts the power of a planetarium at your fingertips. Space.com called it the “best all-around app for astronomers and astrophotographers.”
The app features a massive database of celestial objects. You can search for a particular object, use augmented reality to identify what’s in the night sky above you, and scan through time to find out when an object will appear in the sky. The app has an easy-to-use interface, but the sheer number of features takes time to learn.
SkySafari 7 is available for iOS and Android in Basic, Plus, and Pro versions. The apps range in price from $5 to $50. SkySafari 6 is available for MacOS, with three versions, ranging in price from $10 to $40.
PhotoPills
PhotoPills is a powerful location-scouting tool with a large database of celestial objects. It’s a map, almanac, and calculator stuffed into a single available for iOS and Android.
The app is great for searching a database of celestial objects and events, determining the best time of year to capture the photo, and picking a place to go. After arriving at the location, the app’s augmented reality shows how the sky will move throughout the night.
But its most powerful feature is a collection of calculators. You can calculate the longest exposure possible for pinpoint stars, visualize how star trails will look over some time, and find dozens of other essential astrophotography calculations.
At just $11, PhotoPills is the most affordable astrophotography app.
Stellarium
Stellarium has two things that are great for beginning astrophotographers: it’s free, and it’s available on the web, desktop, and mobile. The open-source software features an impressive catalog of 600,000 stars and 80,000 deep space objects.
The app is a powerful visualization tool for understanding what you’ll see from a particular place at a certain time. The mobile app automatically adjusts to your time and location, instantly showing the names of constellations, stars, and planets viewable in the night sky.
How to plan a astrophotography shoot
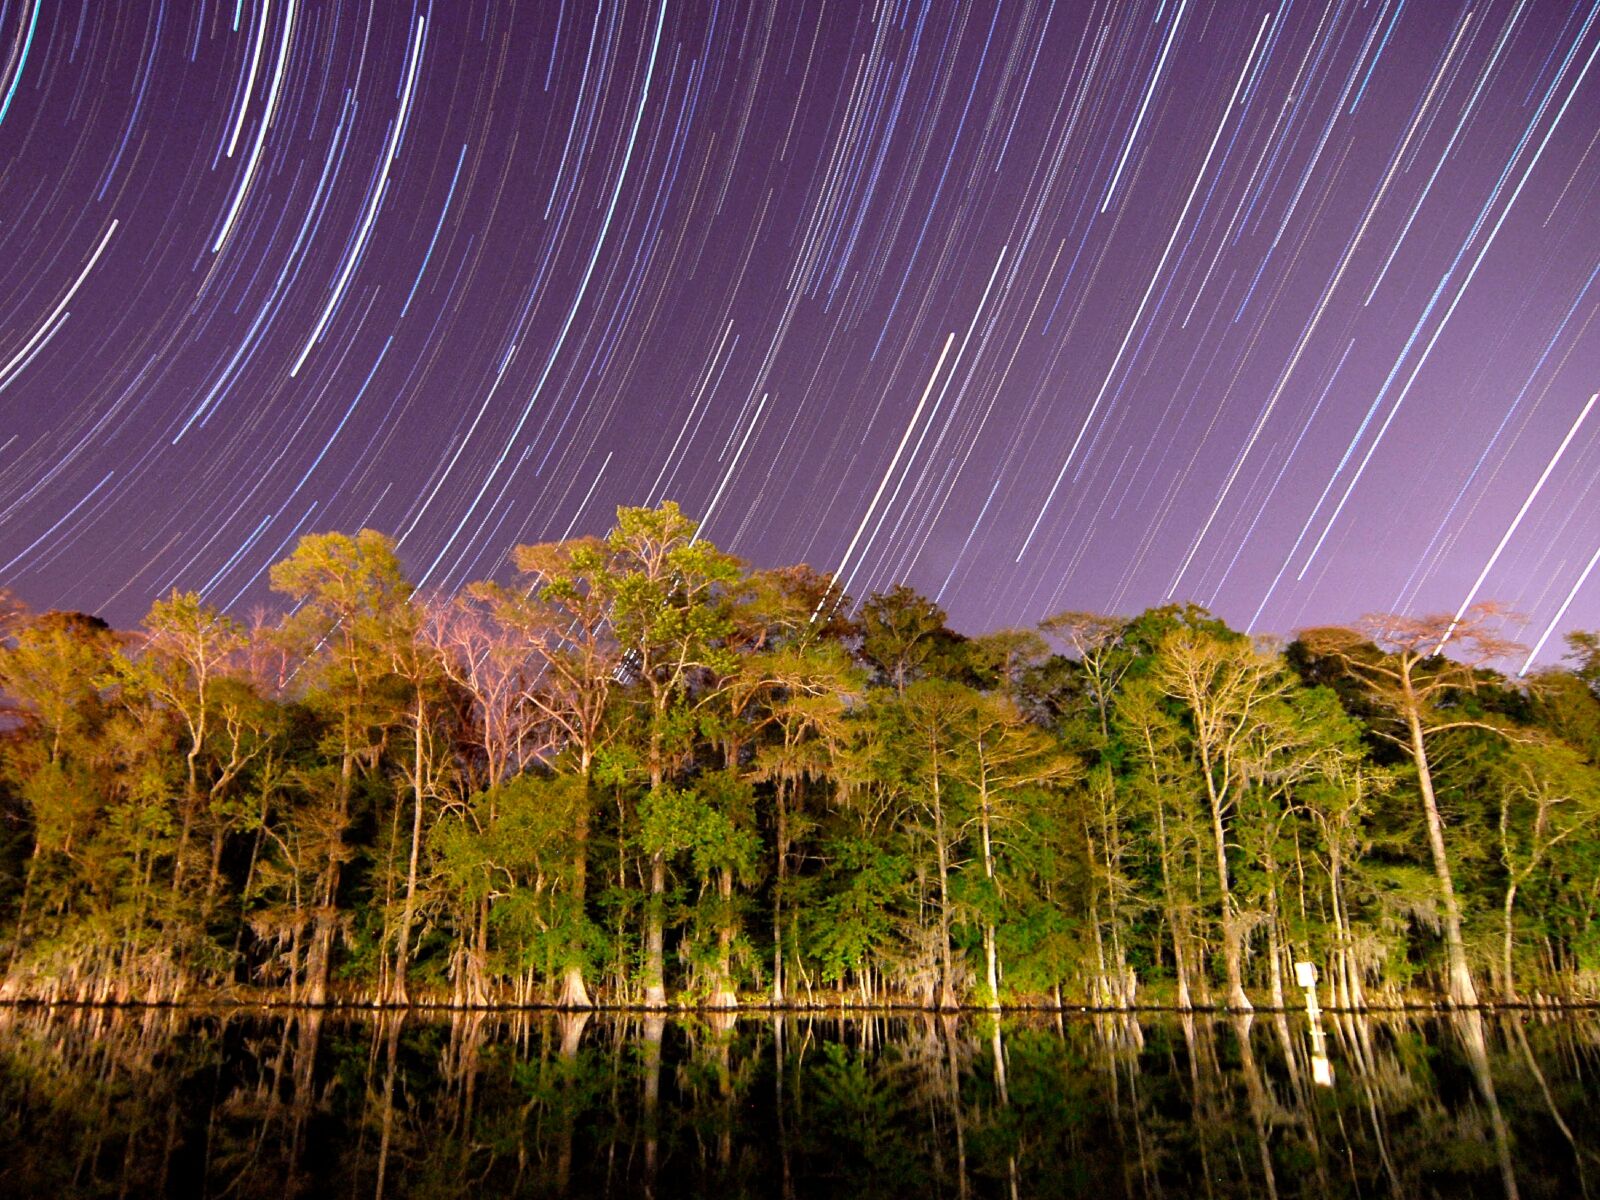
Photo: Jason Barnette
Once you have the right camera gear and the best planning tools, it’s time to map out the astrophotography shoot. Planning can be as simple as finding somewhere to drive after dark or as complex as picking a narrow window sometime in the coming months.
Organizing an astrophotography shoot comes down to just three questions:
- What celestial object do you want to shoot?
- What foreground element do you want to include?
- When do you need to shoot the photo?
Picking the subject
The first step is picking the subject. Do you want to capture a photo of a passing meteor shower? Or one of the moon’s phases? Maybe you want to try star trails?
As a beginner, it’s essential to understand the limitations of the camera gear. You’ll need a pricey telephoto lens or powerful telescope with a camera adaptor to capture photos of the Orion Nebula, Andromeda Galaxy, or even the moon.
Wide-angle lenses are best for nightscapes and star trails, photos of the Milky Way, and celestial events like meteor showers. Use the apps and websites to determine which time of year is best to capture the subject. Or, just wing it and capture photos of whatever is available.
Picking the location
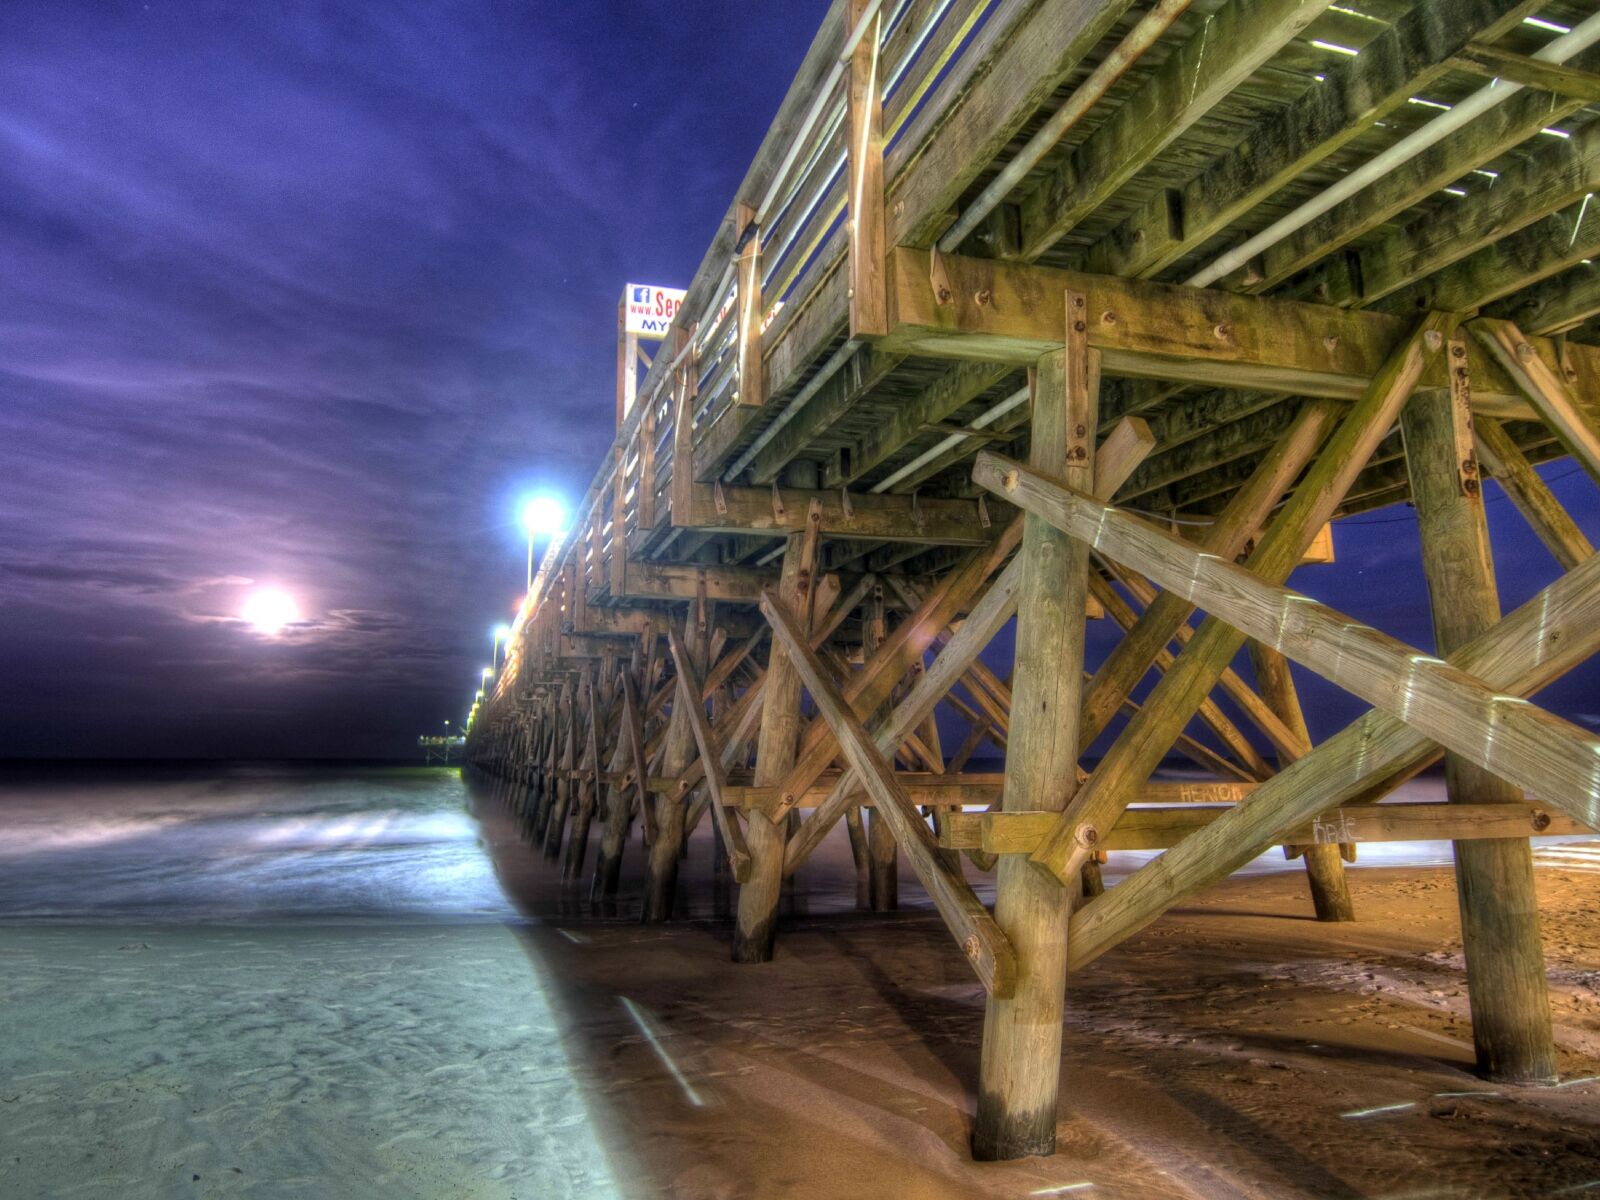
Photo: Jason Barnette
Two issues make picking a location to shoot tricky. The first is light pollution. Street lamps, porch lights, and headlights create a bright dome in the dark night sky, drowning out the twinkling stars. The rule of thumb for astrophotography is to pick a location at least 20 miles away from any population center over 10,000 people and 100 miles from 100,000.
Websites like the free resource from David J. Lorenz make it easy to find somewhere nearby that is sufficiently dark enough. Blacks and grays are the best places to shoot. Blues and greens are acceptable. But, like weather radar, don’t go outside when you see yellows, oranges, and reds.
Use the slider on the right to adjust the opacity of the heat map, revealing the OpenStreetMaps layer beneath. You’ll need to identify some landmarks and then use your favorite navigation app for further research. Identify public parks, scenic overlooks, and public land where you could safely and legally spend a night shooting astrophotography.
The second issue to consider when picking the location is whether you can be there after dark. Many years ago, I was halfway finished with an all-night star trails photos when a forest service ranger pulled up behind my car. He explained that although the scenic overlook’s sign was stolen long ago, the overlook was closed after dark.
The National Park Service has a list of dark sky parks that welcome astrophotographers to a pleasantly dark sky. Another interesting resource could be your astronomy club. NASA’s Jet Propulsion Laboratory has a list of astronomy clubs across the country that could help you find a great location.
Picking the time
You now need to pick the time to do it. With a subject and location, you can determine the best time. But there are several factors to consider.
- What time of night is your subject above the horizon?
- What time of year is your subject seen from this hemisphere?
- When is the next full moon?
- What time is sunset and sunrise?
The first step is picking the best time of year and time of night for your astrophotography shoot. But this might be a non-issue if you just want to shoot photos of any night sky.
Did you know the light reflected from a full moon can be 13 percent as bright as sunlight? Shooting astrophotography within seven days of a full moon is not recommended. Instead, use resources like Stellarium and Time and Date to plan your shoot within five days before or after a new moon.
Another rule of thumb for astrophotography is to wait two hours after sunset to begin capturing photos. Although the summer months are the most comfortable, they are the worst for astrophotography because of the small window of about six hours of darkness. However, the middle of the bitter cold winters presents over 12 hours of darkness — plenty of time for a stunning star trail photo.
Expert tip: Arrive at your chosen location before sunset to scout the area and pick your foreground before dark.
Setting up the camera
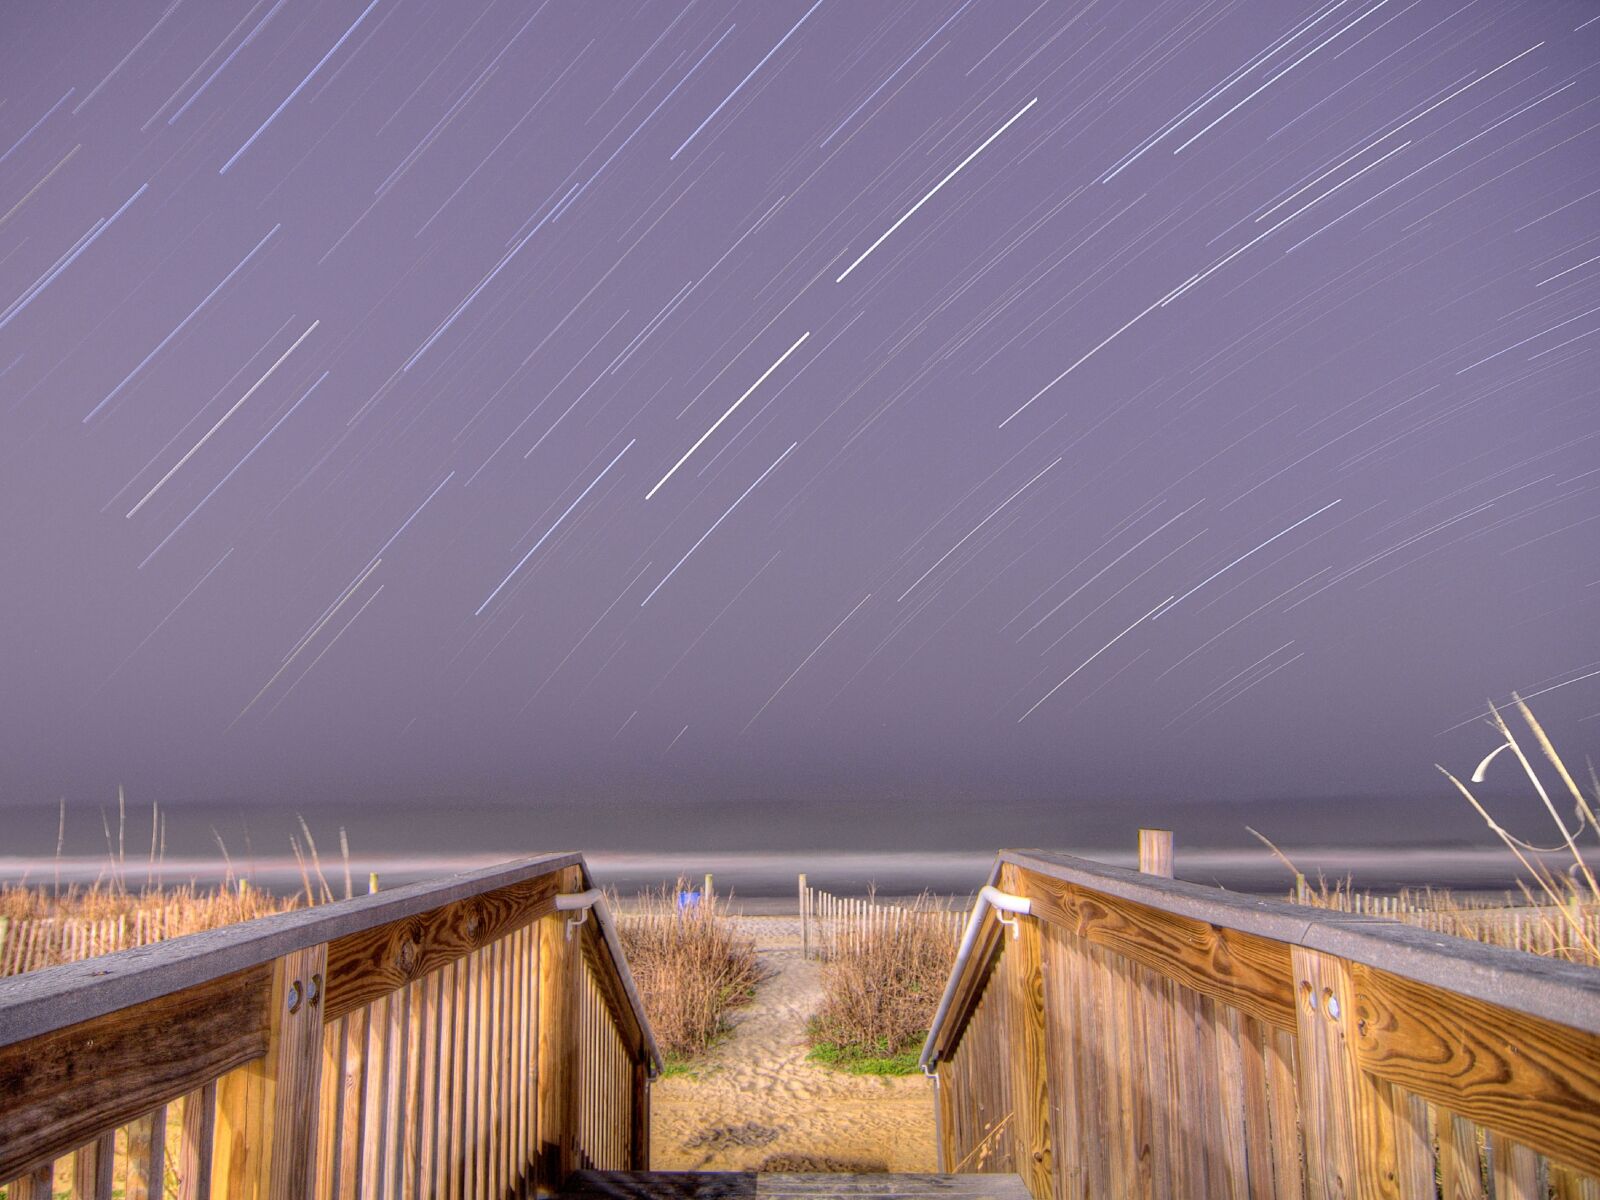
Photo: Jason Barnette
The first thing to do when you arrive at the location is to find the spot to set up the camera. If you plan to shoot a nightscape that includes part of the landscape, you must find the best place that aligns your two subjects. But how can you see the landscape in the dark?
There is a fast and easy method for framing a nighttime photo. Set the camera at its highest ISO sensitivity possible at an exposure of about one second and capture a photo. The photo will be too grainy to keep, but it will quickly give you an idea of how your photo is framed.
The Rule of Thirds is one of the oldest photography rules. Imagine dividing the photo frame into thirds horizontally and vertically with four intersecting lines. The points where the lines cross is a “hot spot” in photography. The Rule of Thirds has three simple rules to master:
- 1. Place the subject of the photo in one of the hot spots.
- 2. Align horizontal or vertical elements with one of the Rule of Thirds lines.
- 3. Fill two-thirds of the frame with the dominant subject.
So, how does this apply to astrophotography? Here are some examples of framing photos of the night sky with the Rule of Thirds:
- For star trails, align Polaris with either the left or right hot spot near the top third.
- For nightscapes, align the bottom one-third of the frame with the landscape and the remaining two-thirds with the night sky.
Camera settings for astrophotography
The most important thing to understand about camera settings for astrophotography is that they must be manually set. Relying on auto settings in dark conditions almost guarantees terrible results. But taking manual control of your camera isn’t as daunting as it may seem.
You will need to set five basic camera settings for great astrophotography photos.
Image file type
Most digital cameras can capture RAW images. This file format saves the raw, unprocessed data captured by the camera’s sensor. These large files require 10 — 15 times more memory card storage than a JPG.
Capturing RAW images allows you to make some changes later during post-processing. But RAW formats are not a blank check. You cannot change the focus with a RAW image. But you can change the white balance and adjust exposure to a limited degree.
Expert tip: Set the camera to capture only RAW images instead of RAW+JPG. This will allow you to shoot longer without draining the battery.
White balance
In photography, white balance is how the camera sensor handles color temperatures. The final photo will look the same as the captured scene when correctly set. Improperly set, the photo will appear tinted in red or violet.
Typically, a daylight white balance is best for astrophotography. But this can change depending on your foreground. If you include the landscape in the photo, you may need to adjust the white balance for the foreground. The rule of thumb is to set the white balance for the dominant exposure in the photo.
Fortunately, if you shoot the photos in the RAW file format, you can change the white balance in post-production.
ISO
ISO is a measurement of the sensor’s sensitivity to light. The scale looks like ISO 100, 200, 400, and doubles each time the sensitivity doubles.
For astrophotography, this means using high ISO settings to capture the faint light from the night sky. Typically, night sky photos are captured around ISO 3200-12800.
But you’ll need to test the limits of your camera. The higher the ISO, the more digital noise appears in the blacks of the photo. Experiment with photos at different ISO settings to determine the highest setting for your camera.
Aperture
Aperture refers to the opening of a lens’s diaphragm. The larger the opening, the more light passes through the lens to the camera’s sensor. Aperture is measured with a quirky system of f/stops with numbers like 2, 2.8, 4, and 5.6. But unlike ISO, the aperture measurement is reversed: the smaller the number, the more light passes through the lens.
“Fast” lenses are any lens with an aperture of at least f/2.8. These are great lenses for astrophotography because they capture lots of light in the faint night sky. But these expensive. Beginners in astrophotography can use lenses with an f/4 aperture, but anything smaller will produce poor results.
Expert tip: Variable aperture zoom lenses have a range like f/4-6.3. This means the aperture becomes smaller as you zoom out. For the best results capturing astrophotography with one of these lenses, keep the focal length as wide as possible (smallest number) to achieve the largest aperture.
Exposure
Exposure is a measurement in time of how long the camera’s sensor is active in a mirrorless camera or how long the shutter door is open in a DSLR. The longer the exposure, the brighter the photo will appear. But there are some catches to long exposures that makes it the most challenging camera setting to master for astrophotography.
After a certain amount of time in a single exposure, the stars will begin to form tails as they slowly march across the night sky. This is the beginning of a star trails photo. But what if you want pinpoint stars for a photo of the Milky Way?
There are several rules about the maximum possible exposure for pinpoint stars. The 500 Rule was developed during the days of film photography. The newer NPF Rule is a complicated formula that requires a profound understanding of the Order of Operations and technical specs of your camera.
Fortunately, the PhotoPills app has calculators for doing this math for you. The app’s database of common cameras has all the information — all you need to do is enter some details from the other camera settings.
If the exposure lasts longer than 30 seconds, set the camera to “B” or “bulb.” This is a setting that keeps the shutter door open and the sensor active as long as the shutter release button is pressed. An electronic device like the Pixel Wireless Shutter Release takes care of that.
To check for proper exposure, look at the photo’s histogram you just captured. The curve should peak somewhere near the right third of the chart. If the photo is too dark, increase the ISO sensitivity or exposure. If it is too bright, reduce the settings.
How to focus on the stars
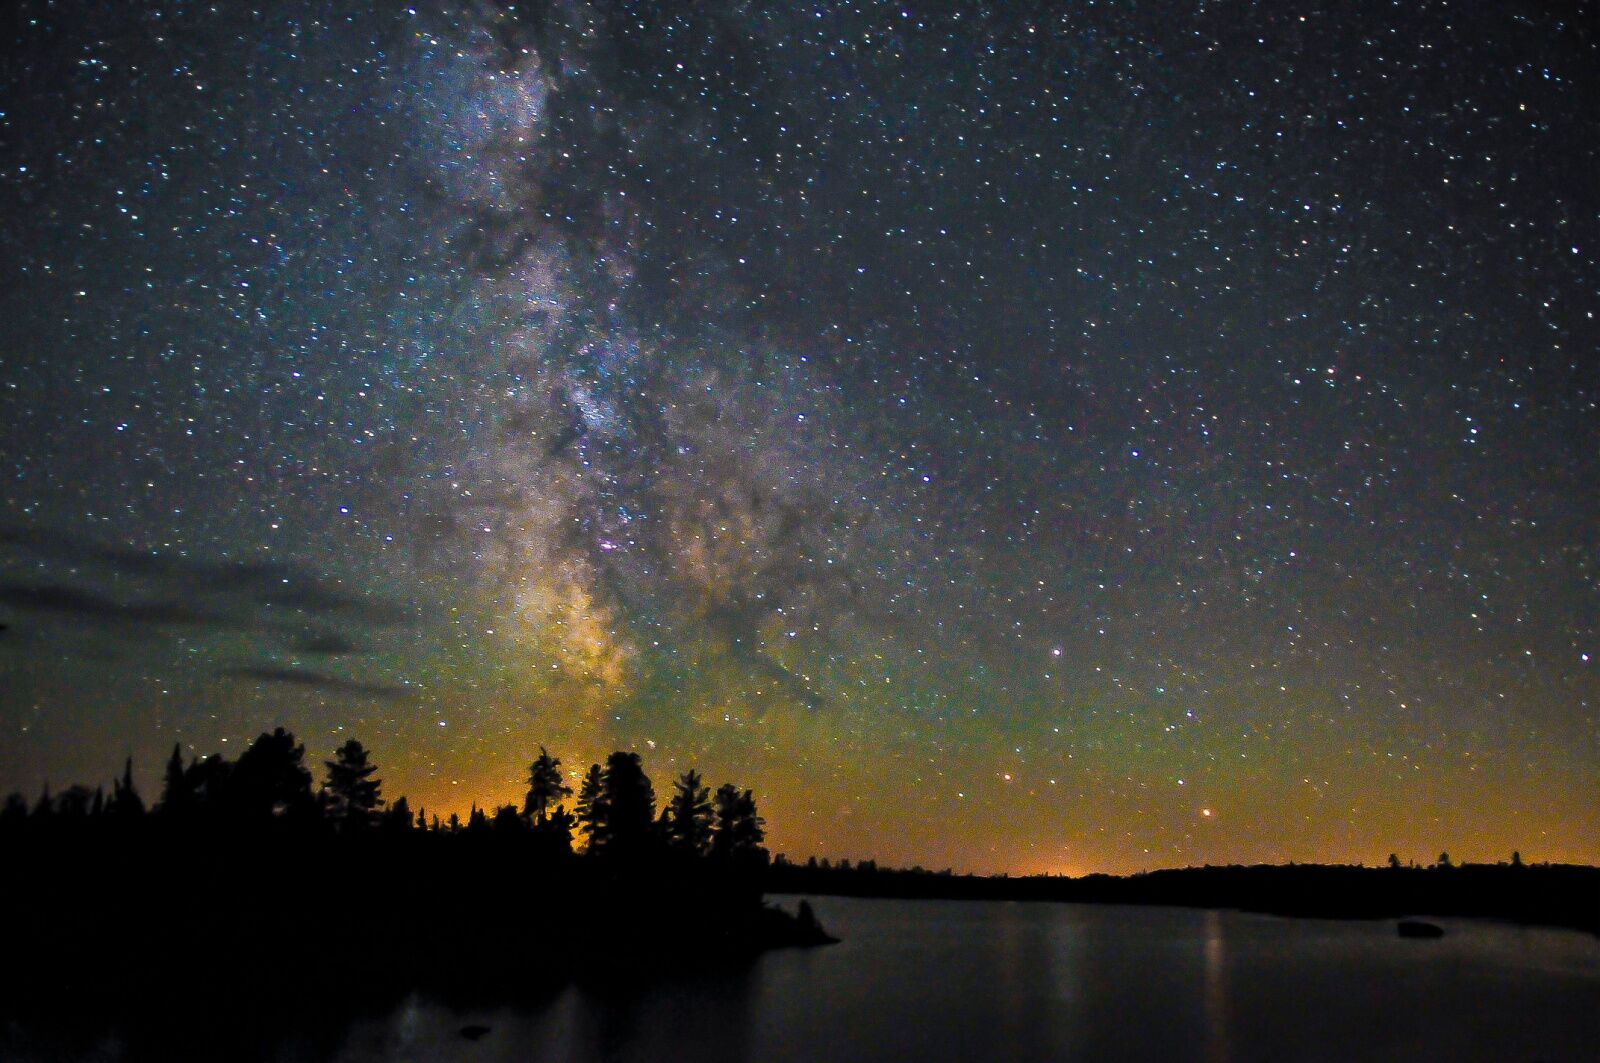
Photo: Crystal Magiera/Shutterstock
Along with taking manual control of the camera’s settings, it’s necessary to manually focus the lens. Autofocus will most likely fail in low light conditions during nighttime photography, resulting in blurry photos. Fortunately, it’s easy to set the manual focus for astrophotography.
Switch the camera to manual focus. Then, use either the viewfinder on DSLR cameras or the live view on the LCD on mirrorless cameras. Twist the focus ring on the lens until the image in the viewfinder or LCD appears sharp. Capture a photo using the correct camera settings. When the photo is finished, zoom into the image to check for sharpness
How to capture nightscapes
Nightscapes are nighttime photos of the sky, including a portion of the landscape. For beginners with wide-angle lenses, this is the best type of astrophotography to capture. Aligning a landscape or foreground object in the bottom one-third of the frame adds interest to the starry sky above.
The best landscapes are devoid of bright lights like street lamps, porch lights, and headlights from highway cars. If you’re shooting a suitably dark location, you may find the landscape impossible to see, no matter the exposure.
But you have three options if you want the foreground to appear in the photo.
- 1. Use a flashlight to “paint” the nearby foreground. While the camera sensor is active, use a powerful flashlight of around 500 — 1000 lumens and move across the foreground like painting a wall.
- 2. Capture a double exposure. This was a popular method for renowned landscape photographer Ansel Adams. Arrive around sunset, set the camera in position, and capture a photo exposed for the landscape. In post-processing, you can add the landscape photo to the nighttime photo to blend to match.
- 3. Capture the nightscape during a full moon.
The last option is one of my favorites. It inspired me to capture a series titled Landscapes at Night. As a full moon reflects about 13 percent as much light as sunlight, a five-second exposure is usually long enough to capture a properly exposed landscape lit beneath a full moon on a clear night.
But remember — a full moon also drowns out the stars and constellations in the night sky. So, this is a type of astrophotography to enjoy while waiting for the next new moon.
Expert tip: Capturing outstanding photos of the moon requires at least a 1,000mm telephoto lens.
How to capture star trails
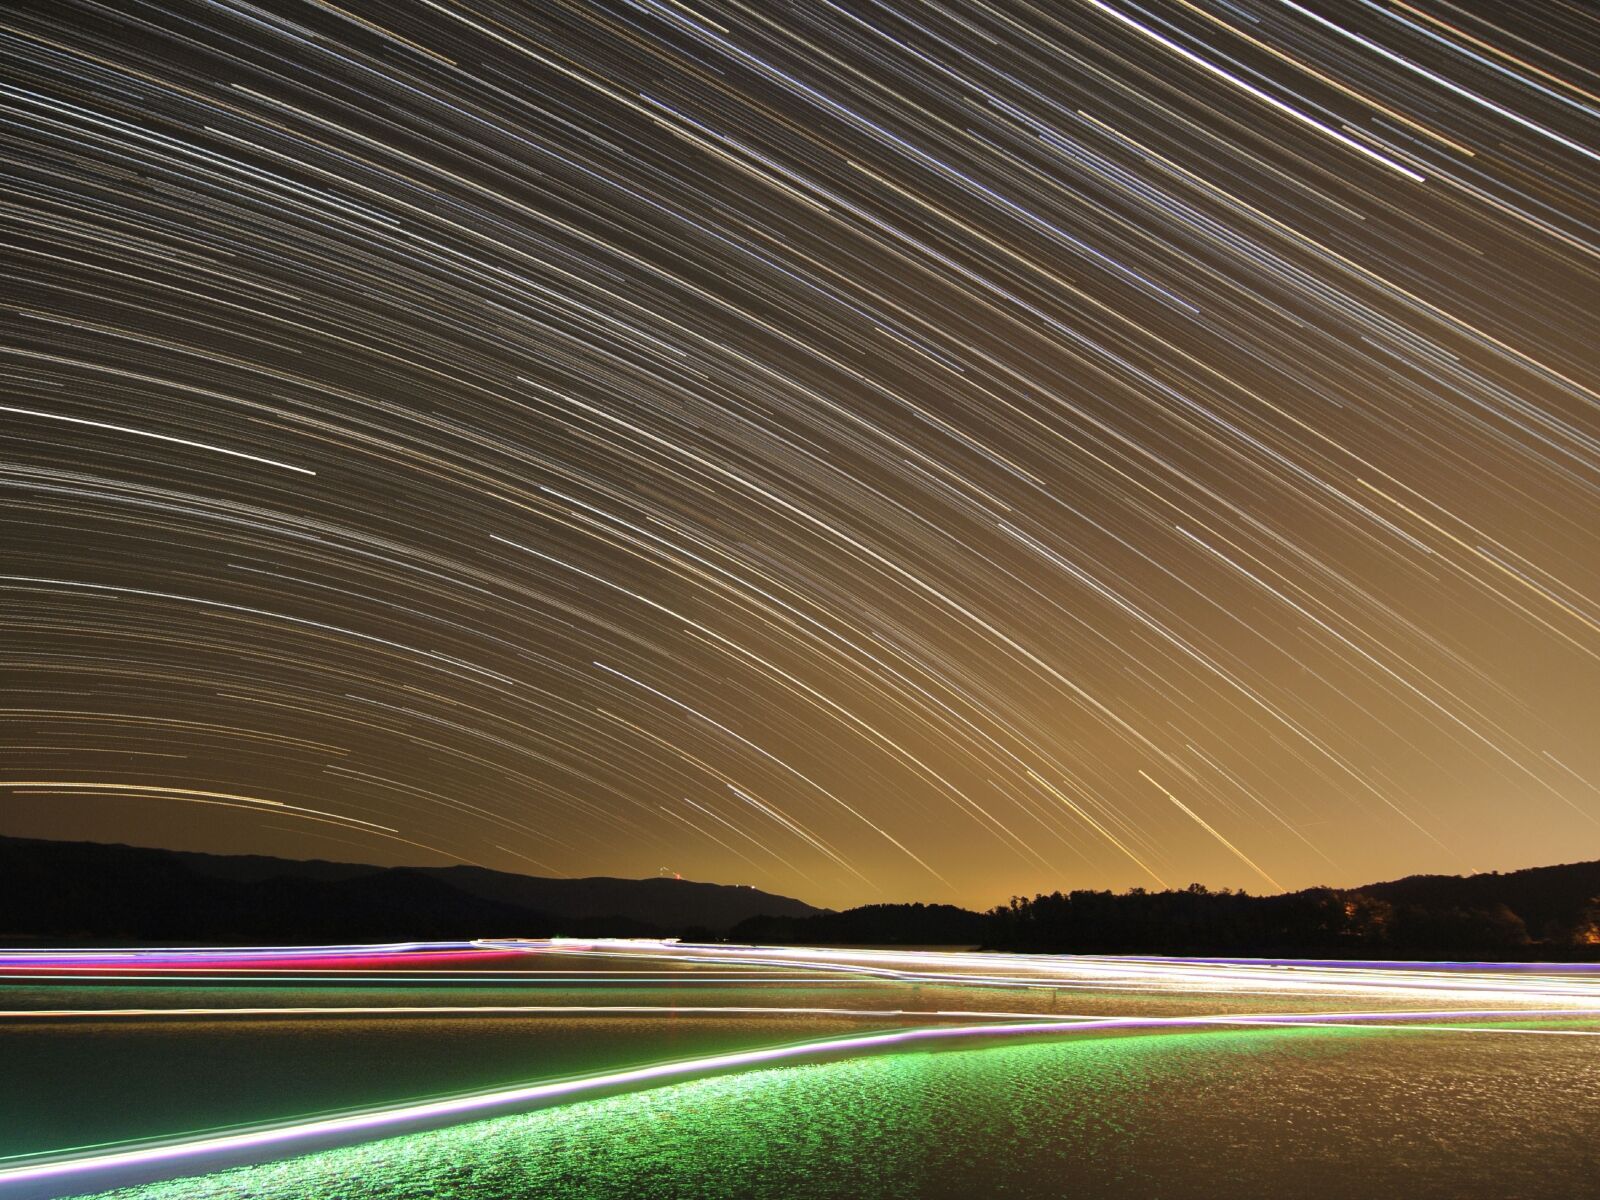
Photo: Jason Barnette
Capturing photos of star trails is the most time-consuming type of astrophotography. But the results can be stunning if done correctly. Star trails have become more popular with digital cameras and software that make post-processing easy.
One of the most common framing tactics for star trail photos is to use Polaris as an anchor. The bright star visible to the naked eye is near the north celestial pole. As the Earth rotates, Polaris remains relatively in the same place in the sky. This creates a swirling pattern around Polaris, commonly seen in star trail photos.
Finding Polaris is easy with apps like Stellarium, SkySafari, and PhotoPills. When framing, align Polaris with one of the hot spots in the Rule of Thirds, typically either the left or right hot spot near the top one-third of the frame.
Follow the other suggestions about framing for a nightscape — find an interesting foreground and align using the Rule of Thirds.
Star trail photos capture a series of long exposures continuously over time. This is best accomplished with something like the Pixel Wireless Shutter Release. Set the intervalometer to capture 60-second exposures continuously.
The best star trails photos are captured for five to six hours. The shortest time that would look good is about two hours. A 60-second exposure means setting the intervalometer to capture between 120-360 photos.
PhotoPills is a great tool for visualizing star trails. Enter the data in the calculator, and the app displays how the star trails will appear based on a certain length of time.
Post-processing the photos
No matter how carefully you choose the camera’s settings, you must post-process the photos to be finished. Fortunately, capturing photos in a RAW file format gives you options. But you’ll need the right kind of software to do it.
Free photo editors like Canva and Pixlr are great for making minor edits to JPG images. However, these websites cannot process RAW images. For that, you need something like Adobe’s Lightroom or Photoshop.
Lightroom is a photo editor and database. Photos must be imported into the catalog before they can be edited. It’s more time-consuming but also keeps your photos organized for quick access later.
Photoshop is a photo and video editor. Without the catalog, you can open RAW images directly in Photoshop and start editing quckily.
Lightroom and Photoshop use the same Camera RAW software for processing RAW images captured by all major camera brands. Once a photo has been opened in Camera RAW, you’re presented with dozens of tools for adjusting the various settings.
For astrophotography, the only settings you’ll need to adjust are the white balance and exposure.
Post-processing star trails presents a wrinkle. How do you edit hundreds of individual photos and combine them? Fortunately, Lightroom and Photoshop can apply edits to multiple photos at once and merge the photos into one with just a few clicks.
Astrophotography requires more determination than most other types of photography. The best time to capture these photos is the cold winter months. As your friends and family go to bed, you leave the house with your camera bag. As they sleep, you don’t. But the result of astrophotography can be stunning and well worth the investment in time and money. ![]()