Photo: seewhatmitchsee/Shutterstock

5 Essential Tips for the Budding Travel Photographer

Travel
by Lola (Akinmade) Åkerström May 17, 2008
MatadorU will teach you the skills you need to become a travel journalist.

UNLESS YOU’RE A PROFESSIONAL travel photographer on an expedition-style assignment, chances are you’re not dragging boxes of equipment around on your travels. Throwing filters, tripods, remote flash, and other equipment into the mix can be quite daunting for the novice photographer traveling with limited space.

But for those interested in doing more with their travel photographs besides sharing great memories with family, here are a few essential tips to get you started on that road.
Go digital

I remember glaring at the Aurora Borealis on a frigid winter night in Iceland and marveling at the continental divide the next day, knowing I’d captured it all on film. I also remember my look of bewilderment and helplessness when the clerk handed seven blank rolls of film back to me – which most likely had been damaged by the airport’s x-ray machine. I’ve been a digital photography convert ever since.

Besides fast shutter technology, instant gratification, and enough space limited only by memory card size, the advantages of Digital Single Lens Reflex (DSLR) photography are numerous.

With a flick of a dial or press of a button to change settings, you can shoot rapid action shots or serene landscapes within seconds. In the past, this involved switching out film with the right type of speed to get the best shots or using multiple purpose film which rarely produced the desired effects.

Photographer Ryan Libre explores why buying a DSLR may be worth it for your travel photography.

Once you’ve decided to switch technologies and purchase a digital SLR, be sure to invest equal time in learning the controls and settings of your camera.

Pick your lens wisely

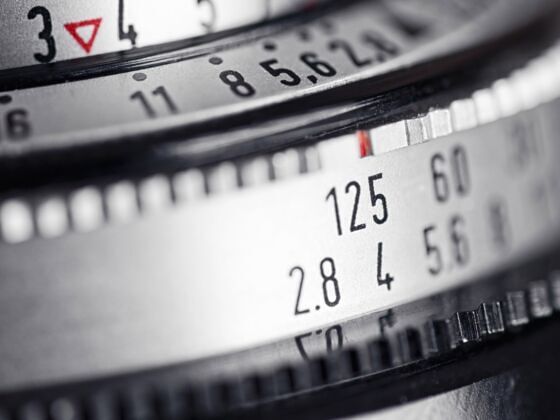
Lenses are the single most expensive and important gear you should invest in outside the body of your camera.

Memorizing and fully understand technical terminology such as focal length, aberration, barrel distortion, angle of view, and rectilinear are enough to deter novices from moving to the next level of photography.

However, understanding lenses need not be complicated. There are a myriad of lenses out there but the three common ones are: Wide-Angle (great for landscapes), Telephoto (great for portraits), and Zoom (great for snapping lions from a safe distance).

While most digital SLR cameras come with classic telephoto lenses which are great for depth of field photographs and portraits, most professional photographers use wide-angle lenses. These types of lens pull you right into the middle of the action, and cover a lot more field of view.

Macro lenses get you right up close to that caterpillar chewing a leaf, while Fisheye lenses give you the illusion of staring through the peephole of a door.

According to All Things Photography which provides a solid introduction to camera lenses, “…a quality lens will last….cameras come and go!”

Stock up on memory

Fast shutter speeds mean you can easily amass hundreds of photographs in a single day. Having extra memory cards provide you with more flexibility without having to delete older pictures to make room for newer ones in the field.

The most popular cards are SanDisk 2GB SD memory cards which can be bought for as low as $6.81, a 92% drop from its original price of $89.99.

If you envision snapping a couple thousand photographs during your travels, I would suggest buying 1G to 2G cards so you can space out your photographs in the event that you lose your camera or a card. This allows you to accrue the least amount of image loss.

Make sure you store your photography safely once your travels are over.

Learn a few basic editing tips

While using certain polarizing and UV filters can help adjust composition in the field, remember you’re still contemplating whether or not to take travel photography more seriously as a hobby. Also, investing in the latest photo processing software may be overkill at this stage.

Instead, consider Free Photo Editing Software to enhance your travel photography.

By learning a few editing tips such as adjusting contrast, lighting, and saturation, you can improve the visual impact of your photographs.

The example below illustrates before (left) and after (right) results of increasing contrast in a simple landscape photograph.

As you become more comfortable with working your base equipment and minor editing, you can begin including add-on gear such as filters as well as shooting images in a RAW image format so you can fully post-process them later.

Get a sturdy bag

Digital SLR cameras are much heavier than your classic point-and-shot cameras, and as such, are more difficult to carry around and conceal.

While most cameras come with the heavy duty black cases that let everyone know you’re carrying a camera, you could consider investing in a bag that not only protects your equipment from the elements, but also protects it from potential theft and allows you to move more freely.

Bags such as the Vituri Fashion SLR Camera Bag (also available in rugged brown for guys at Wal-Mart for almost 50% off) look great, are sturdy, and camouflage you as a traveler.

Check out more Cool, Funky & Unique Camera Bags.

For more on getting started, Google provides a great list of Digital Photography 101 resources. *Get access to paid freelance travel photography jobs and an active community of travel journalists through the travel photography program from MatadorU.

Discover Matador