Photo: Geartooth Productions/Shutterstock

How to Hike California’s Lost Coast Trail

California Hiking Backpacking
by Bill Hatfield Jun 21, 2023

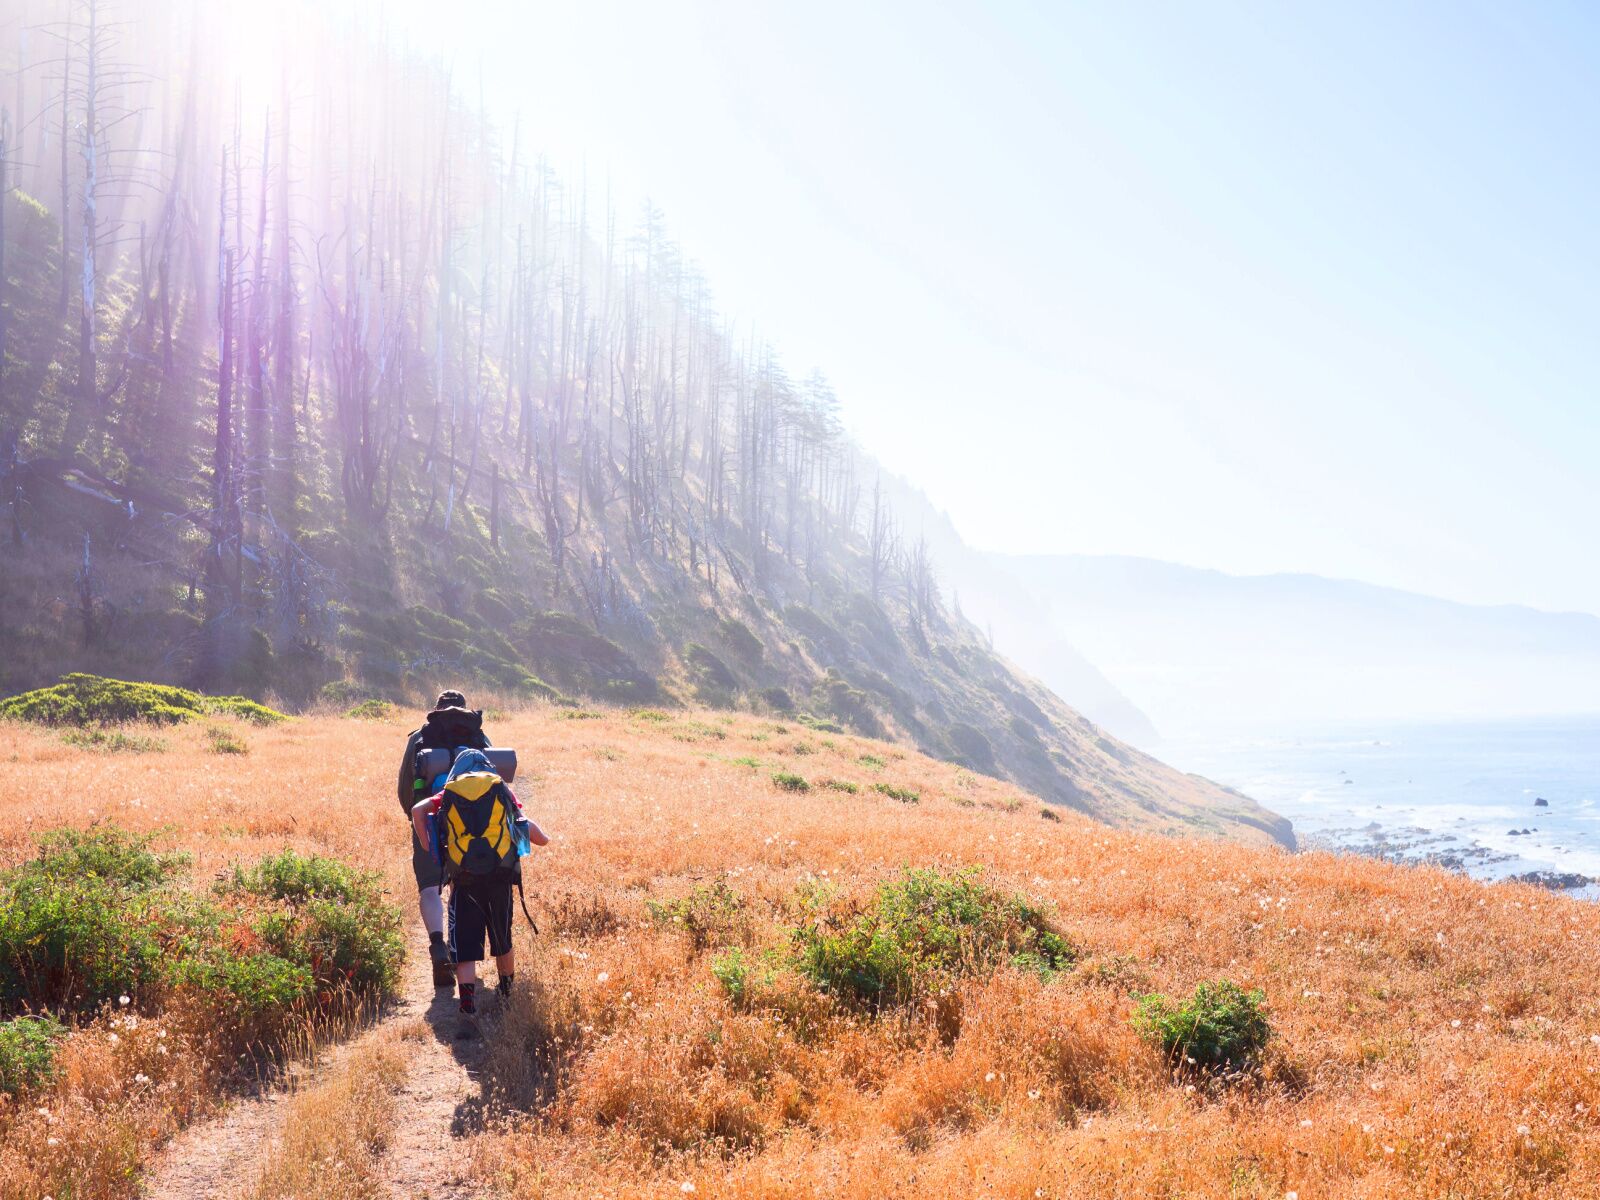
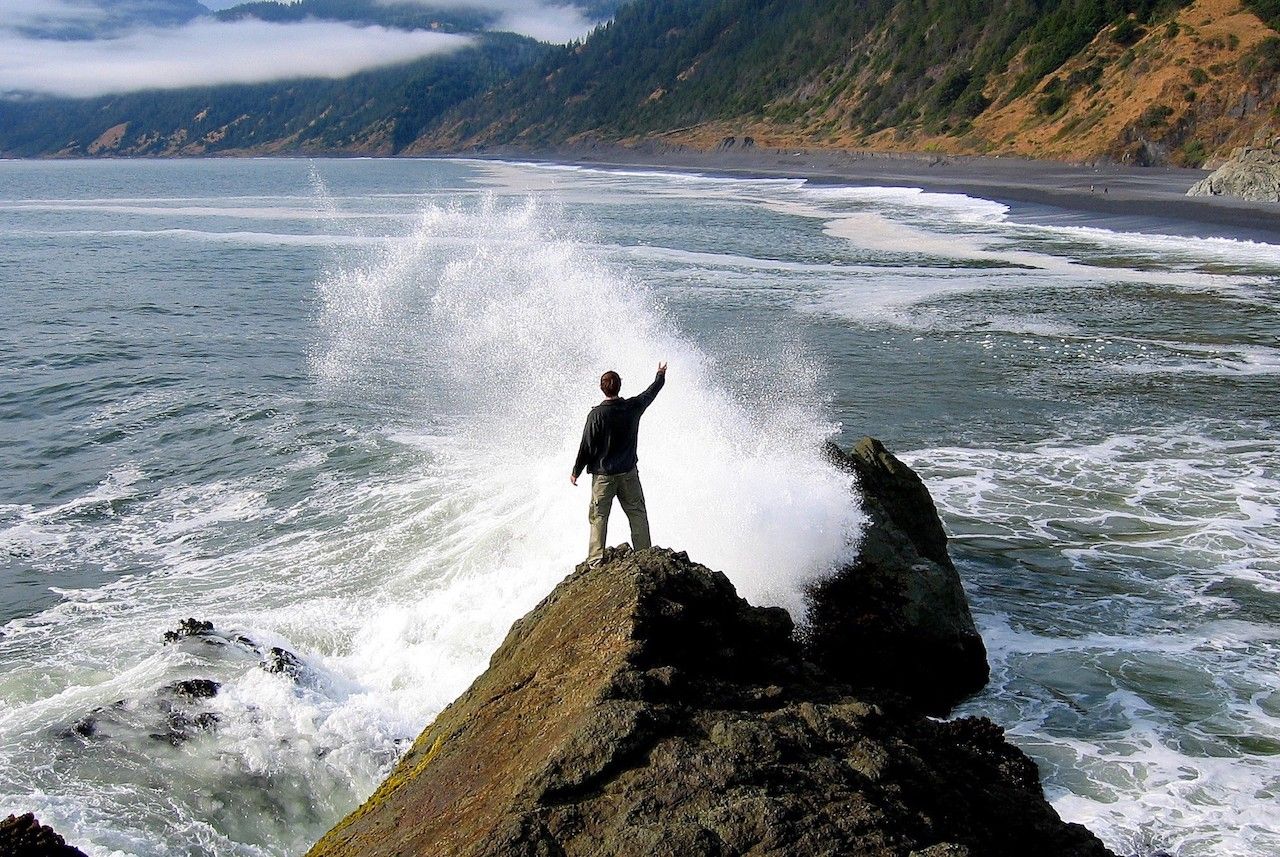
Just a half-day’s trip north of San Francisco (4.5 hours, to be exact) is where a stretch of California coastline bulges west. The highway steers inland, leaving only rugged coastal terrain along the shore. As a result, there’s little development and not very many ways to explore the coastline — except for on foot.

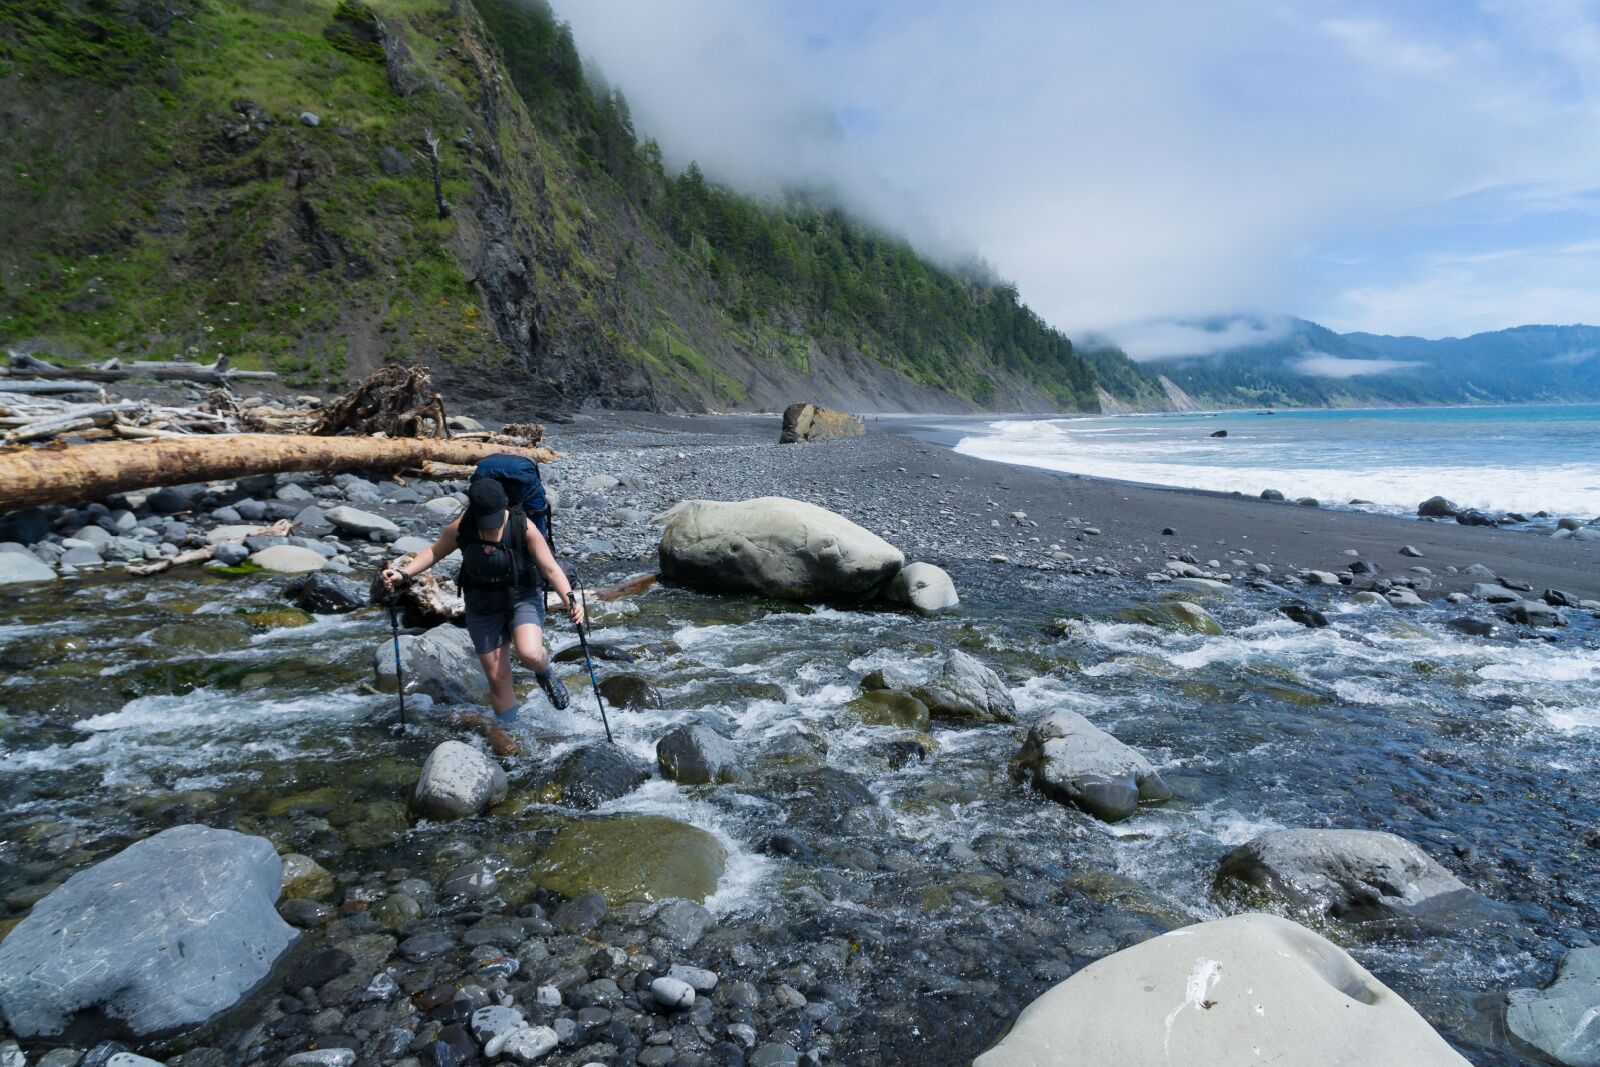
That area of northern California is known as The Lost Coast and is home to the gorgeous Lost Coast Trail. It beckons ambitious and intrepid hikers in search of unforgettable scenery and wilderness experiences that differ from most of what you’ll find along the Pacific Coast Highway. This isn’t Big Sur, Mendocino, or Santa Barbara; you won’t be just a stone’s throw from lux hotels and high-end wineries. To hike the one-of-a-kind Lost Coast trail, you’ll have to venture into treacherous territory that roadbuilders thought better to let be. And be totally cool with getting wet.

If you’re up for the challenge, though, the Lost Coast Trail will reveal one of the finest examples of isolated coastal wilderness in the United States. You’ll need to be alert for rogue waves and rockfalls, be able to identify threats like rattlesnakes and poison oak, clamber over slippery boulders, trudge through ankle-deep sand and gravel, and study tide charts to safely navigate narrow shores. All that is to say, it requires a bit of skill and planning.

The Lost Coast officially stretches northward from Sinkyone Wilderness State Park to the mouth of the Mattole River, totaling 35 miles. It’s part of the 68,000-acre Kings Range National Conservation Area, which has another 80 miles of trails. But when most people say, “Lost Coast Trail,” they mean the popular 24.6-mile beach route between the Mattole River and Shelter Cove. Here’s a guide to get you ready for that hike.


Lost Coast Trail map


The Lost Coast Trail isn’t very close to any major cities. If you’re not driving, you’ll want to fly into an airport like Eureka or San Francisco, rent a car, and drive to the trailhead. The closest big(ish) town for stocking up on supplies is Eureka in the north and Garberville to the southeast, though there are a few outfitters and general stores in Shelter Cove and Fortuna.

Getting a Lost Coast Trail permit

Hikers on the Lost Coast trail, california

Photo: Ahturner/Shutterstock

To avoid any confusion about permits, here’s a line from the reservation website: “Permits are issued on a first-come, first-serve basis through Recreation.gov. There is no lottery system for King Range Wilderness permits and there are no walk-in permits available at the King Range Project Office.”

Between May 15 and September 15, the daily quota is 60 people per day entering the trail. Thirty people per day are allowed the rest of the year. Permits become available October 1 for the following year, so you’ll need to make your plans fairly far in advance. A non-refundable $6 reservation fee applies to each permit, and permits are good for up to five people, with a maximum group size of 15 (requiring three permits). Commercial groups and organized tours are required to have a special use permit. Contact the Bureau of Land Management’s Kings Range Project Office for an application.

Bear canisters are required for storage of all scented items, like food, toiletries, trash, and toothpaste, and are available for rent at area BLM offices and some local stores. Check the Bear Canister section of the BLM’s Kings Range website for options. Most REI stores rent bear canisters (as well as other backpacking items).

You’ll also need to decide which direction to hike. Prevailing winds in the area typically blow south to southeast, so most people hike north to south. Most of this guide is organized with that in mind. If you do plan to hike north, remember that the shuttle service providers generally operate northbound only.

Directions and shuttles

lost coast trail beach and field

Photo: Pete Niesen/Shutterstock

Plan your exit strategy early and arrange to have a vehicle at your end point. Then, either drive another vehicle to your starting point (planning to retrieve it after the hike) or use one of the area shuttle services. Book these well in advance.

If you plan to use a shuttle, consider booking it on the front end and using it to get to the starting point, rather than having it meet you at the end. That way, you’re not worrying about finishing exactly at a specific time to meet your shuttle. It also means your car will be waiting at the end point.  The Bureau of Land Management’s Trip Planning Guide, available on the website, currently lists three licensed shuttle service providers: Lost Coast Adventures, Mendo Insider Tours, and Bill’s Lost Coast Shuttle.

If you don’t use a shuttle, you’ll be driving either to Black Sands Beach or Mattole, and the route to the trailhead will follow winding, narrow, and steep roads as you head coastward from US 101. To hike northbound, turn off US 101 at the Garberville/Redway exit and follow the signs for Shelter Cove, 22 miles away. For southbound hikers, Mattole is a 42-mile drive from US 101. Exit the highway at Ferndale and follow the signs to Petrolia, where you’ll turn onto Lighthouse Road and head to the trailhead.

Lost Coast Trail route planning and considerations

woman crossing water on loast coast trail california

Photo: Geartooth Productions/Shutterstock

Give yourself two nights on the trail, or even three if you want, taking three or four days to hike the 24.6 miles. Expect to cover about 8 miles a day at most, given the variable terrain you’ll encounter. And consider the tides, which may force you to wait for safe travel conditions each day.

While you enjoy the scenery on your hike, keep a few important details in mind. First, never turn your back on the ocean. Rogue waves can approach at any time and much of the hike is directly on the beach. If it feels like the tide is coming in, move away, even if it’s a little too early/late. Don’t think you can outrun the ocean.

A small area north of Punta Gorda and two large sections of trail are impassable at high tides, and you’ll need to approach these sections as the tide is going out. It’s the 4-mile section between Sea Lion Gulch and Randall Creek, and the 4.5-mile stretch from Miller Flat to Gitchell Creek that are both impassable at high tides, so check NOAA for updated tide info. It’s also a good idea to check the surf report, as you won’t want to be out there during huge ocean swells.

In general, California’s coastline is public as long as you’re below the high-tide mark. But inland of the high tide mark can be private property. Obey posted no-trespassing signs, and stay out of cabins. Expect to cross several creeks while on the trail, many of which can become impassable during and after heavy rains. Learn to identify and avoid poison oak and ticks, and watch out for rattlesnakes, especially among piles of driftwood. Make sure you have a rain jacket and waterproof backpack cover.

Lost Coast Trail segments (north to south)

lost coast trail segments

Photo: Robert Stolting/Shutterstock

Mattole to Punta Gorda Lighthouse

  • Distance: 3.2 miles
  • Elevation gain: +/- 200 feet

As you leave the parking lot at Mattole, you’ll walk among sand dunes and grasses before descending to the beach near the point where the Punta Gorda lighthouse comes into view. As noted above, this small section around Punta Gorda can be impassable during high tide.

Punta Gorda Lighthouse to Spanish Flat

  • Distance: 6.3 miles
  • Elevation gain: +/- 342 feet

After exploring the lighthouse, operated by the Coast Guard between 1912 and 1951, you’ll walk above the shore before eventually dropping to the rocky beach and entering the high tide zone around Sea Lion Gulch. There, the trail begins a 4-mile section mostly sandwiched between the ocean and the cliffs, where variable and rocky trail conditions are the norm. Watch for signs directing you around large outcroppings, which can be impassable at all tide levels.

At Cooskie Creek, you can get a reprieve from the tides and camp upstream from the beach if you wish. From there to Randall Creek, you’ll need to be on your toes as rocks can tumble down from above while waves crash against your feet. After Randall Creek, the trail continues on the grassy bluff through Spanish Flat, which is a popular place for camping.

Spanish Flat to Miller Flat

  • Distance: 6.6 miles
  • Elevation gain: +/- 100 feet

Continue along the elevated, grassy trail beyond Spanish Flat for the better part of the next four miles, passing beneath two large parcels of private property. Around Big Creek, the trail will dip to beach level, and from there to Miller Flat, you’ll occasionally be able to choose if you’d prefer to hike on the beach or grassy trail. This area is another popular option for overnighting as it’s roughly the two-thirds mark of the hike.

lost coast trail spanish flat

Photo: Bryan Brazil/Shutterstock

Miller Flat to Gitchell Creek

  • Distance: 4.5 miles
  • Elevation gain: +/- 100 feet

The last section of impassable-at-high-tide trail begins at Miller Flat. Plan on walking this 4.5-mile section in one push if you can. If you can’t, retreat up Shipman Creek or Buck Creek to wait out the tide. You’ll be walking over difficult, rocky terrain between breaking waves and crumbling cliffs, so take it slow to avoid twisting an ankle while you’re already tired. From Gitchell Creek on, you’ll be out of the high tide zones for the remainder of the Lost Coast Trail.

Gitchell Creek to Black Sands Beach

  • Distance: 3.7 miles
  • Elevation gain: +/- 100 feet

This last section may seem easy, but don’t underestimate this final push. Sinking in deep sand and gravel with each step will keep you from establishing a victory-lap pace. But your hike on the Lost Coast Trail is finished when you arrive at Black Sands Beach, your trek down California’s Lost Coast Trail will be complete.

If you didn’t use the shuttle service when you started, you’ll need to retrieve your car at this point. Give yourself at least two hours to drive the 50 miles between trailheads.

Final thoughts

Remember to check road, trail, and weather conditions before your trip and carry a tide table. Plan on rain every day and consider yourself lucky if that’s wrong, especially if you’re hiking the trail outside of the Memorial Day to Labor Day window. Call the BLM King Range Project Office at (707) 986-5400 or the BLM Arcata Field Office at (707) 825-2300 for any questions in advance, but don’t count on having any cell service while you’re hiking. Because of that, you’ll want to download and print the trail map on the BLM’s website (and laminate it, because rain). Buying a map at one of the field offices is also a good idea.

Discover Matador